Ginee
Ginee
 29-6-2022

How to upload products in Shopify? Every decent e-commerce platform offers built-in import and export tools. However, they are usually far from being an omnipotent solution that can cope with any business requirement. One of them is to upload products and start doing online business. In this article, let’s discuss how to upload products to Shopify and sell better!
Read also: Make Shopify Store Live Now! Here 5 Steps to Start Doing It
Your Selling Stock is Messing Up? You Need Help!
Ginee Omnichannel allow you to automatically sync every stock from all of your online stores. It’s faster way to helps you profit!
How to Import Products to Shopify

Why do you need to import products to Shopify? Firstly, because you migrate from another platform. It is the fastest way to recreate your current product catalogue on a new storefront.
Secondly, you may leverage this functionality to update your products or inventory. However, it is necessary to export the corresponding data to get an ecommerce product CSV file that reflects the current state of things. Then, you can edit it and re import the updated data back into the system.
Bear in mind that you always need to back up your product data to prevent any data loss. For instance, importing a CSV file edited in Microsoft Excel or Numbers often leads to the absence of product images and other issues. Therefore, it is extremely important to create a correct copy of your catalogue before applying any changes.
Importing Products from Another Store
Let’s assume that you’ve exported a CSV file with products from another platform (for example, how to import products to Shopify from AliExpress) and now need to transfer this data to Shopify. Unfortunately, you cannot do that since the existing sheet is arranged according to the external platform’s requirements. Edit it to match Shopify’s CSV file format. Note that even a missing header leads to the import failure.
Another limitation is associated with file size. You cannot import more than 15MB of product data to Shopify. As for the import process itself, it is quite simple. You only need to follow these steps:
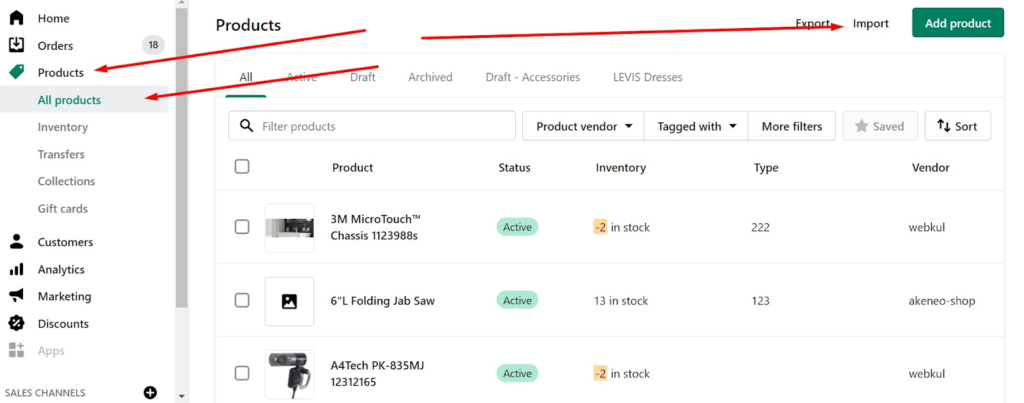
- Go to Shopify admin -> Products -> All products and hit the Import button.
- The Import products by CSV file window displays. Click Choose File there.
- Locate your product CSV and click Open.
- Upload the file.
Reimporting Products From Shopify
Shopify enables you to apply changes to your catalogue items via CSV. Export your products, edit the CSV file and re import it back into your Shopify store. However, this method doesn’t work if you rely on Oberlo and other similar apps to add products to your website. You can import products to Shopify as follows:
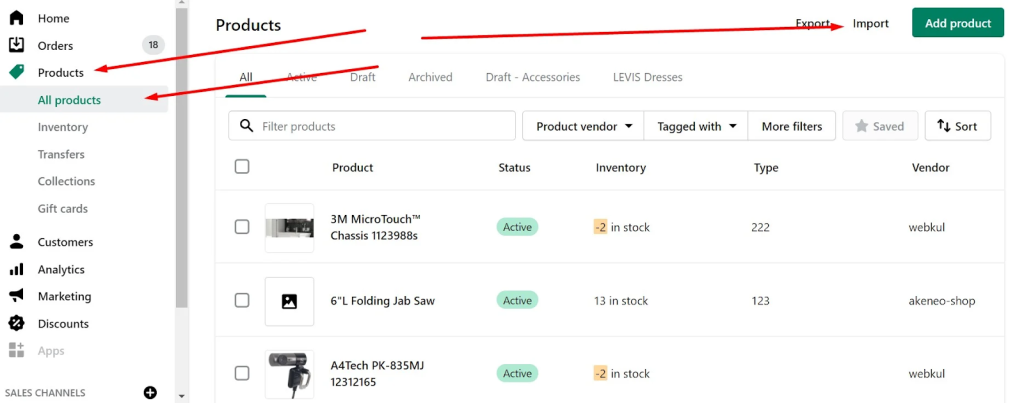
- Go to Shopify admin -> Products -> All products and hit the Import button.
- The Import products by CSV file window displays. Click Choose File there.
- Locate your product CSV and click Open.
- By enabling the Overwrite of any current products that have the same handle feature, you override the corresponding Shopify data. For columns that aren’t present in the CSV file, the corresponding product information remains untouched. For instance, if you transfer items without price information, Shopify will keep the existing values.
- Upload the file.
Shopify Product Import: CSV File Format
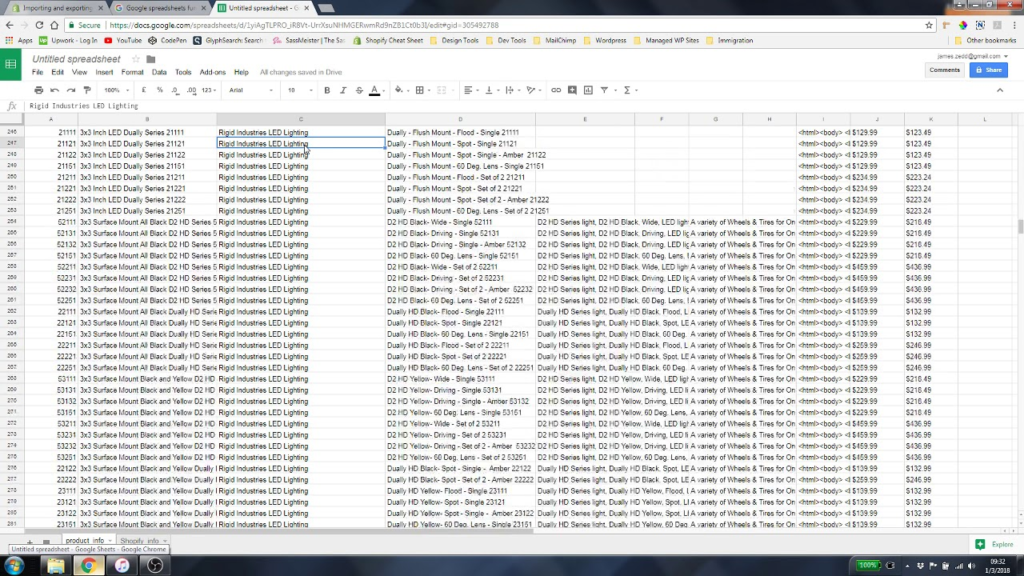
Below, you can see a list that shows the structure of a typical product file supported in Shopify product CSV template.
- Handle. Here, you should specify unique product names using letters, dashes, and numbers. Note that spaces, accents, periods, and other characters are prohibited.
- Title. This column contains the title of your product — for instance, Women’s Hoodie. Since this field is required, it cannot be blank or missing.
- Body (HTML). Here, you can provide the product description in HTML format or as plain text. This one can be blank.
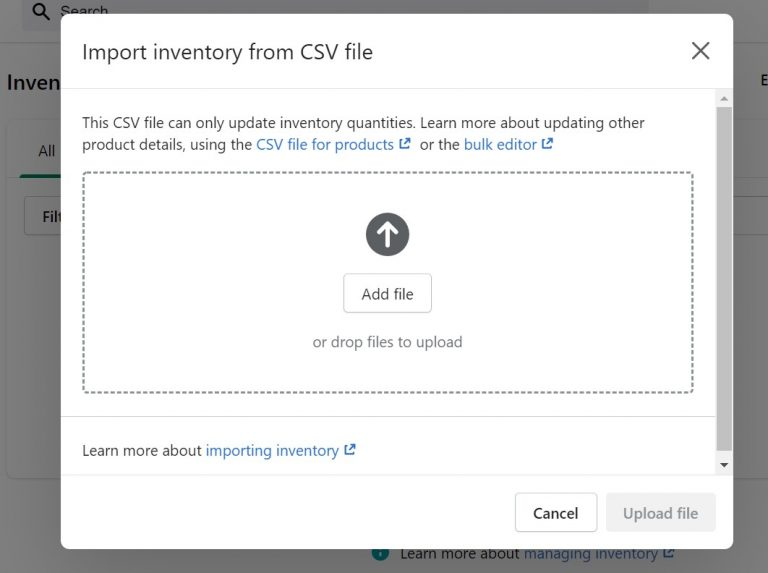
How to Import Inventory to Shopify
How to add multiple products in Shopify? In addition to products, you can separately import inventory data into Shopify. This procedure updates inventory quantities only. It neither creates a location nor updates the values that identify products.
Do You Want to Manage Multiple Marketplace Just by Single Person?
Of course you can! You can handle multiple stores from all marketplace just by single dashboard. Cut your Business’s cost, and Boost your Efficiency at the same time.
It is recommended to import your inventory only when other adjustments aren’t taking place to avoid errors and possible issues. For instance, transferring the update during the ongoing sales or manual changes will lead to incorrect product quantities. To import the inventory data to Shopify, follow these steps:
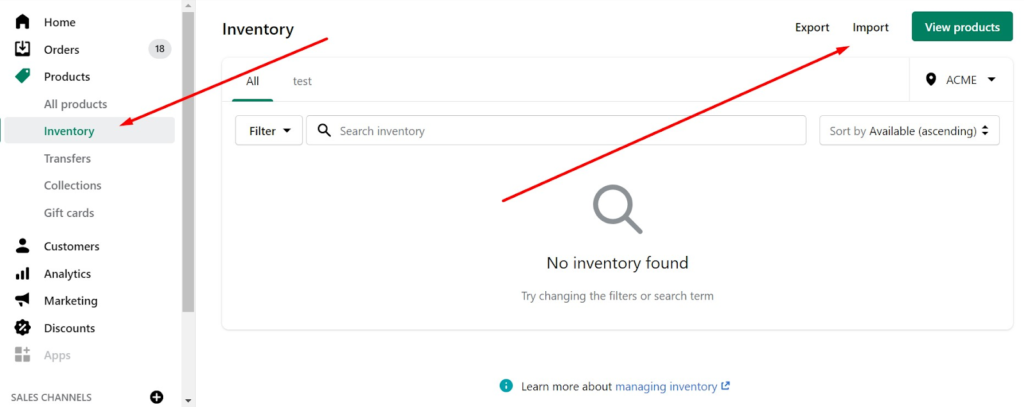
- Go to your Admin -> Products -> Inventory.
- Click Import and select your CSV file with the update.
- Click Import inventory, verify what you intend to import, and hit the Start import button.
Read also: How to Add Products from Oberlo to Shopify Quick and Easy
Shopify Inventory Import: CSV File Format
Shopify uses the inventory CSV files (could be Shopify-product CSV github) to transfer information that identifies products and product variants as well as their inventory quantities at a particular location. The columns below are a part of the inventory sheet:
- Handle – here, Shopify displays a unique product name using letters, dashes, and numbers. Note that spaces are prohibited.
- Title – this column is optional. However, including it lets you leave the values blank.
- Option1 Name – you can specify a product option name, such as Colour, here. Set it to Title for no options.
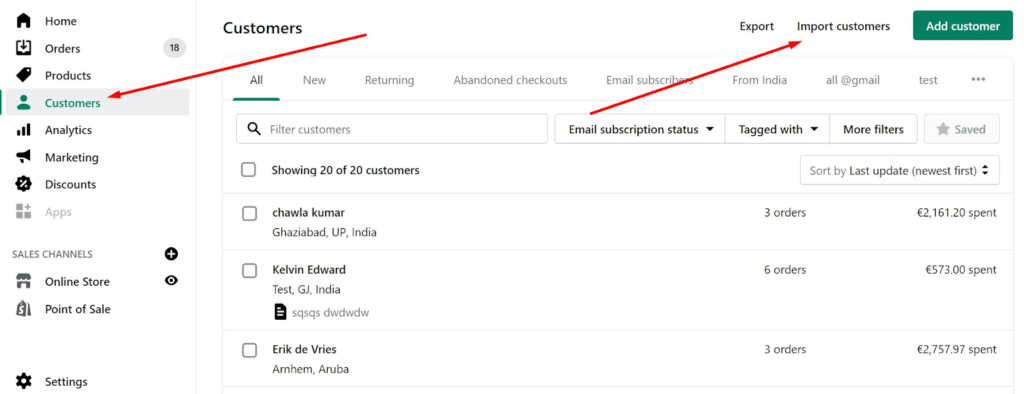
How to Import Customers to Shopify
How to add products to catalog Shopify? Like in the case of products, Shopify enables you to import customers in two ways. Firstly, you can create a customer CSV template, export it, apply changes, and then re import the file back. Secondly, it is possible to build a custom CSV file and upload it to your Shopify website.
Note that the system constrains the customer import flexibility. Unfortunately, you cannot transfer CSV files larger than 1 MB. For 2 MB of client records, you will need two separate CSV files.
Moreover, some of the customers’ information can’t be imported into Shopify. Since passwords are encrypted, you cannot move them from other platforms to Shopify. It means that it is impossible to move customer accounts entirely. Shopify lets you transfer only customer records.
- Go to the Shopify admin and click Customers.
- Choose the Import customers option.
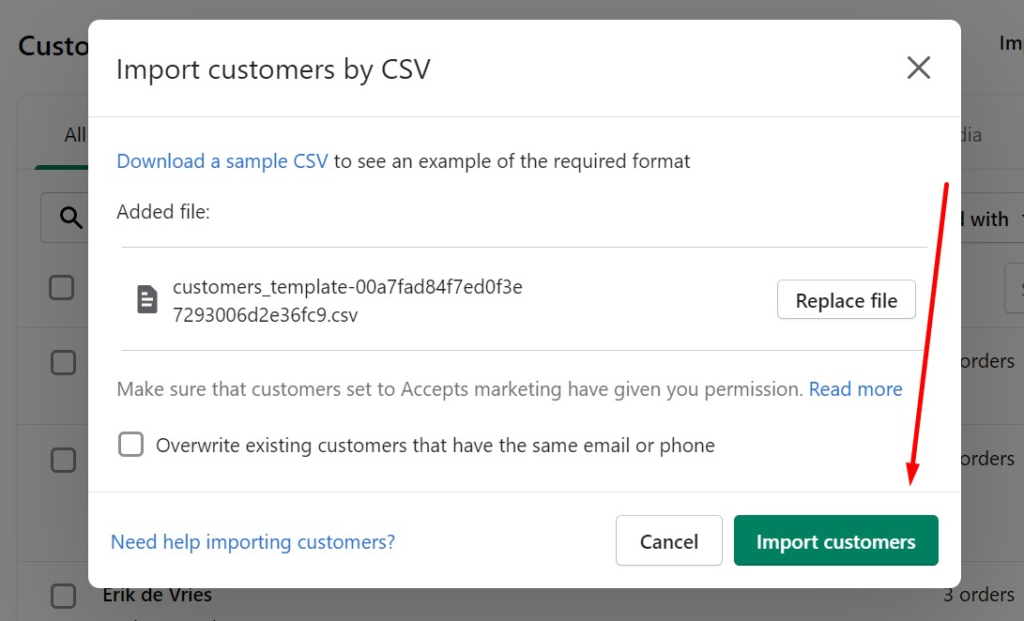
- You will activate the Import Customers By CSV dialog where it is necessary to click Choose File and select your CSV with customer data.
- Click the Overwrite existing customers that have the same email option to update any existing customers.
- Hit the Import customers button to launch the procedure.
Read also: Setting up Your Shopify Store for the First Time? Easy!
Shopify Customer Import: CSV File Format
Add all the headers listed below to the first line of your customer CSV. All of them are included in the customer CSV template. Also, note that all CSV file headers are case sensitive. It means that you should strictly follow the examples that appear in the following table. The wrong capitalization may interrupt the Shopify import process.
- First Name. The customer’s first name.
- Last Name. The customer’s last name.
- Email. The customer’s email address.
How to Import Orders to Shopify
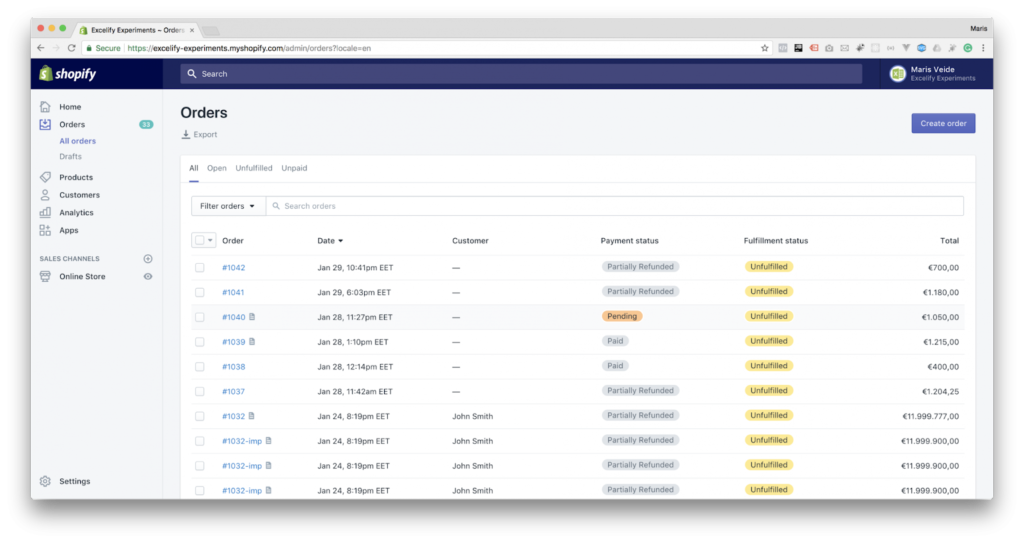
If you want to import orders to Shopify, you will face an obstacle that cannot be passed over. Importing this entity manually is impossible by default.
Therefore, you need to find another way to transfer data unless you are a Shopify Plus user who has access to the Transporter app. Since the latter is available to a limited group of users, we’d like to draw your attention to a third-party solution that every Shopify merchant can use.
Conclusion
Shopify import products API process is indispensable when you migrate from another platform to Shopify or you want to edit your Shopify product data.
This task requires a lot of time, tech skills, and carefulness. If the edited file has just one thing different from the standard file, such as the file name or the title of a product, your import will fail.
Join Ginee Philippines!
After you upload products to Shpoify, you will need to manage your products and online store so that you get loyal customers, right? Well, don’t worry because Ginee Philippines can help! With Ginee, you can manage products, stocks, orders, promotions, chats, and more only in a single dashboard. Join Ginee Philippines now FREE!
Upload Products to Shopee and Lazada Automatically! How?
Ginee product management allow you upload products to all of your online stores from all marketplace just once! Save time, save cost, save energy, join Ginee Now!