Ginee
Ginee
 28-6-2022

How to add sub menu in Shopify? A submenu is created as a menu that is contained within another menu, like a menu accessed from a more general menu.
Read also: Simple and Effective! How to List Products on Shopify
For instance, in most cases, a submenu is created with a small arrow pointing to the right at the edge of the option, and users need to navigate the menu to access a sub menu by pressing the right arrow key or press the left arrow key to collapse the submenu.
Actually, this is like a broad categorization of the menu that will divide the menu into more particular groups. For example, in case your products are t-shirts, shoes and jeans in a menu, then you will be able to categorise this menu into more simple categories, like female wear, female t-shirt, then female jeans.
Your Selling Stock is Messing Up? You Need Help!
Ginee Omnichannel allow you to automatically sync every stock from all of your online stores. It’s faster way to helps you profit!
What Is the Drop Down Menu?
Drop-down menus make it easier for customers to explore your online business by grouping products, collections, or pages together in labels. It is made of top level menu items and nested menu items. Top menu items appear in the main navigation menu code and nested menu items appear in the drop down menu when you hover on.
If you have a lot of products, for example, you may prefer to group them into collections and then organize them using a drop-down menu from the main menu or add custom menu in Shopify. This can assist a consumer in locating the things they’re looking for.
It is also a smart choice when you choose to utilise Shopify Menu Apps to support you complete your work with menus in general, and submenus in particular on Shopify.
There are some apps that can generate manual and automatic filters to organise collection easily, there are some that can generate mega menus within several minutes, and some enable users to present products to the search engine and many more.
When your aim is to create a large user-friendly store on Shopify, you can use several ways to build a multi level drop-down menu Shopify to represent your products as categories and subcategories. They are easy to reach from one Shopify mega menu examples without usability issues.
The Shopify mega menu leaves many options for manoeuvring: by minimising the number of clicks, website visitors can reach lower-level products quickly and easily. What other advantages does the Shopify multi-level menu have to offer?
- You can nest one product under several Shopify sub-menu categories.
- It is easy to merchandise specific products placing them on top of the multi-level menu Shopify, e.g. grouping the items as “Bestsellers” or “Newest Products”.
- You can set up and modify the Shopify drop-down menu without the need to hire a technician.
- Shopify supports a sidebar menu and horizontal navigation bars, which help to tidy up the layout.
If well designed, a Shopify drop down menu product page makes the search intuitive and easy-to-use. Instead of using Shopify’s generic link lists that often lead users to confusion, opting for a multi-level menu seems to be a no-brainer. Let’s dive into the basics of creating a mega menu and its peculiarities based on a current Shopify theme.
Effective navigation has a double-sided effect on any eCommerce website: it helps to organise products and collections and makes it easier for clients to find them. The right use of a Shopify drop-down menu may be a real problem solver for the issues that repeatedly occur in stores with hundreds or even thousands of different products.
You must be seeking an easy way to make a menu in Shopify that will be responsive and easy to navigate. In fact, with a minimum investment of time and money, you can organise your products in a smart, intuitive way, thus improving the usability of your eCommerce site and appealing to your target audiences.
How to Create a Drop Down Menu in Shopify
First, it is essential to get acquainted with how to add drop-down menus on Shopify. The platform allows adding a top-level item to the navigation link in the main menu. Lower-level links for submenus are displayed in a drop-down menu – a user can hover over the main link to navigate to the needed level.
As the Shopify mega menu tutorial states it, this form of navigation is called “nesting”, and can have up to two levels after the top-level one. To create a nested drop-down menu, set up several link lists in the Navigation section in the Shopify admin. But, if Shopify nested menu not working, you can always contact the Shopify customer service.
The header navigation menu is the first thing that visitors notice when they come to your website, it plays a significant role in highlighting main sections. A well-designed drop down menu with clear and informative sections is a must-have for any online retailer.
Do You Want to Manage Multiple Marketplace Just by Single Person?
Of course you can! You can handle multiple stores from all marketplace just by single dashboard. Cut your Business’s cost, and Boost your Efficiency at the same time.
How to add products to drop down menu Shopify? Follow these steps to create a drop down menu in Shopify easily:
Step 1: Sign in Your Shopify Store, Go to Online Store and Then Click on Navigation
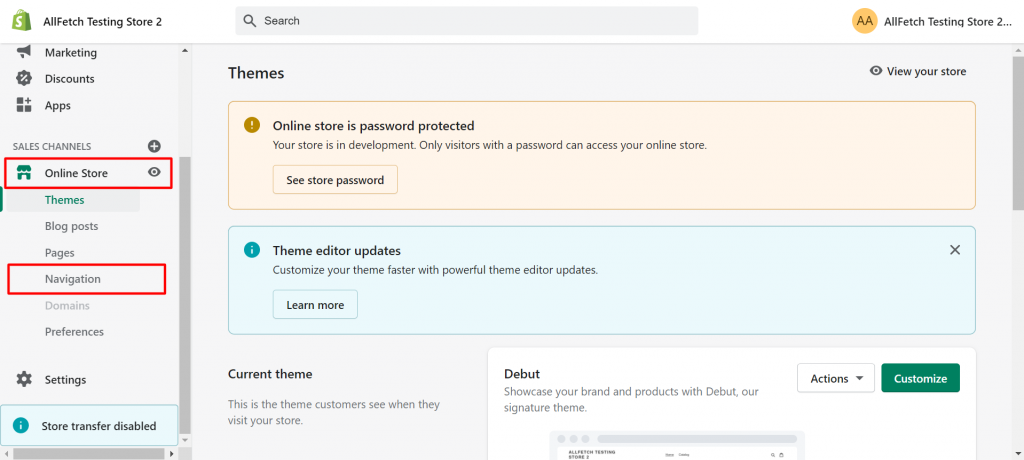
How to add drop down menu in Shopify debut theme? Make sure you have already logged in your Shopify account. From your Online store, hit a click on Navigation.
Step 2: Create Top-Level Menu Item
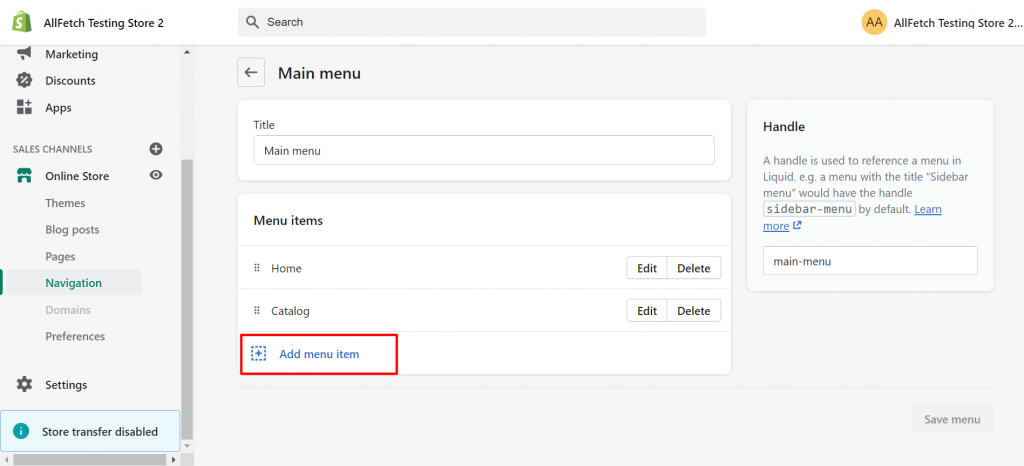
The top level menu is the main menu. It includes menu items that are organised horizontally or vertically on a menu bar. Each menu item may or may not contain a list of submenu items. A top-level menu is always visible on the header of your website. To create a top-level menu item, you select Main menu > Add menu item.
Step 3: Create Menu Items That You Want to Put in the Drop Down Menu
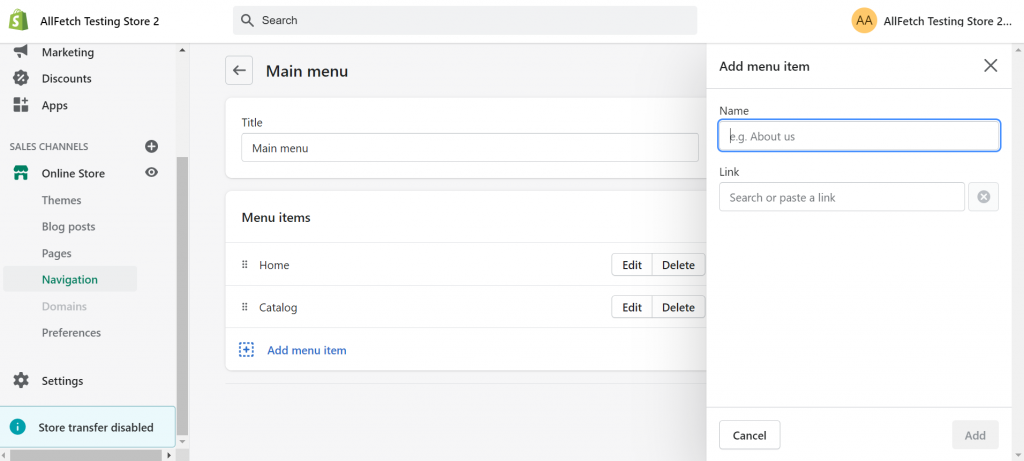
Type a name for each link you want to add, then click Add button (e.g. you can link to specific collections, all products, or pages etc.)
Step 4: Create Nested Menu Items
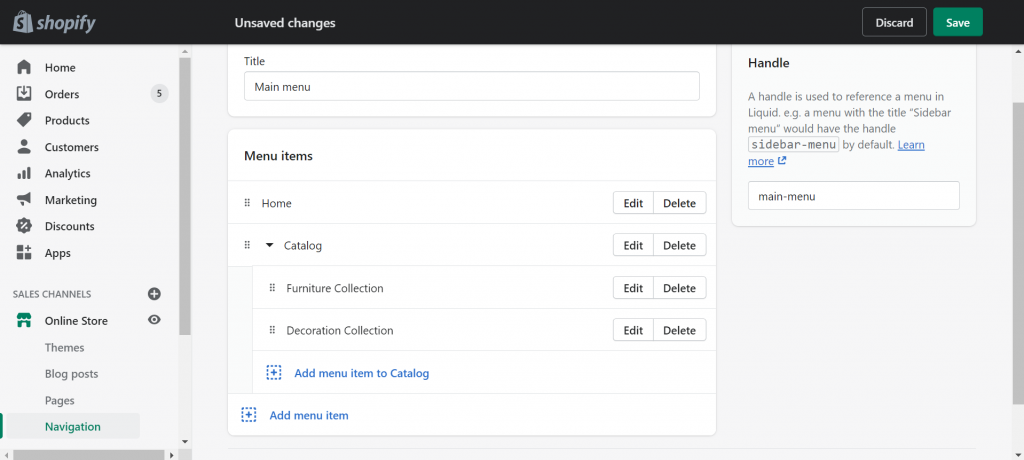
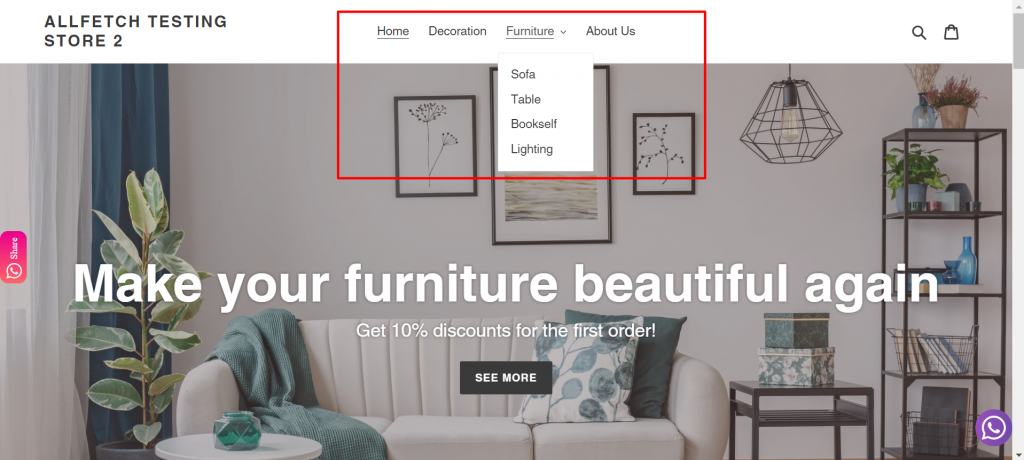
Drag and drop the sections, pages related to the same topic under one label. For example, Sofa, Table, Bookshelf and Lighting are related to Furniture. Therefore, they are placed under the label of Furniture collection.
Read also: 5 Tips to Drive Shopify Traffic and Boost Your Sales
Step 5: Click on Save Button to Save All Changes
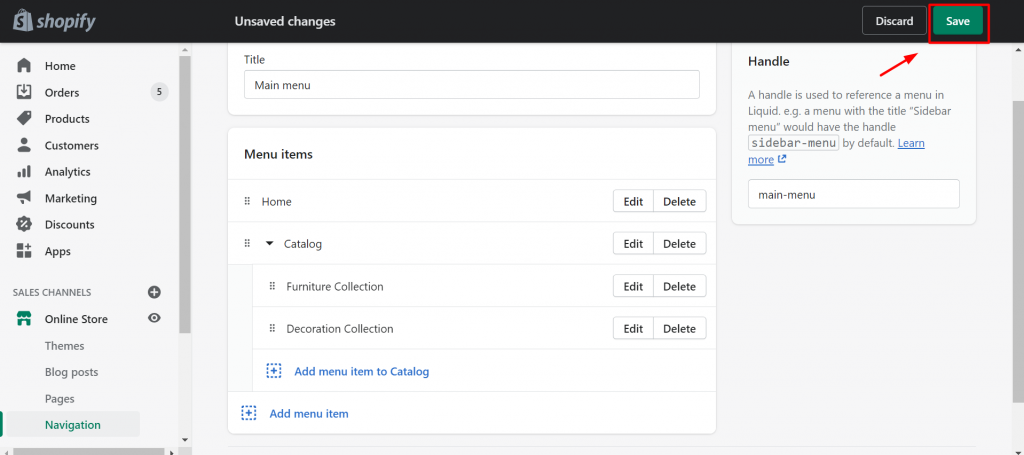
Finally, as usual, click the Save button. You are now successful in categorising your product into different sub-menus that provide a convenient browsing of your store, at the same time, save time for the customers.
Conclusion
A drop-down menu can provide visitors with a clear and obvious navigation for limited amounts of data. It is easy to make a drop down menu in Shopify without technical knowledge. Hope that this tutorial is helpful and easy to follow for you.
Join Ginee Philippines!
Adding a sub menu in Shopify might be a good way to drive traffic to your online store. But, you also need to know how to manage your online store in Shopify very well, so that you will have loyal customers and that can increase your sales faster. You can use Ginee Philippines to manage your stores because you can manage products, stocks, orders, and more in a single Ginee dashboard. Join Ginee Philippines now FREE!
Upload Products to Shopee and Lazada Automatically! How?
Ginee product management allow you upload products to all of your online stores from all marketplace just once! Save time, save cost, save energy, join Ginee Now!