Ginee
Ginee
 29-5-2022

Are you the first time using Shopify and looking at how to use Shopify? You go to the right sites. In this article, we will discuss Shopify and how to use it.
Shopify Basics: What Do You Need to Know?
You might be curious on how does Shopify work. First, let’s discuss what Shopify is. Shopify is a marketplace platform that offers many benefits to grow your business. Before you can use this Shopify platform, of course you need to setting up your Shopify store first. Now the question is how to create store on Shopify? Here are several steps you need to take to make your Shopify account such as:
Your Selling Stock is Messing Up? You Need Help!
Ginee Omnichannel allow you to automatically sync every stock from all of your online stores. It’s faster way to helps you profit!
- Create your Shopify account.
- Find the suitable Shopify theme for your stores.
- Customize your store functionality.
- Sell your business products in Shopify.
- Decide whether you want to sell in a person or using a third party.
- Manage your product inventory. Orders and also shipping.
- Market your business.
- Monitor your business analytics.
Read also : 20 Top Online Selling Sites Philippines, Do Business Now!
How to Use Shopify
For those who are beginners, you may be confused about how to use Shopify. Actually you can find a Shopify tutorial to help you. Here are the steps on how to use Shopify.
Sign Up for Shopify’s Free 14-Day Trial
For those who want to use Shopify to sell their products and question “is Shopify easy to use?”, now you don’t need to worry because you can join the 14 days trial which is free. In this 14 days trial, you can try to understand each tools Shopify function so you can use it easily.
To join this 14 days trial, you can go to Shopify.com/signup and type in your email address as well as your password. Then don’t forget to input your store name as well. Once you have the trial section, Shopify will ask your experience when using the platform. You can answer it based on true experience. Remember to verify your email address before you start using Shopify platform. This will help to keep your account secure.
Get Acquainted with the Dashboard
After you know how to use Shopify for free, it is time to get acquainted with Shopify’s dashboard. When you login for the first time, you will see the 4-point checklist designed to help you get started using the Shopify platform.
Then you need to check the left sidebar to help you manage your business in Shopify. You will see a drop-down menu when you select the options that appear there. You can update many things regarding your business in the settings option that is placed in the left sidebar.
Customize Your Website’s Theme

When you know how to register in Shopify, you might take the steps to register your business account. Once you have set your Shopify account, now it is the time to customize your website’s theme to make your website look great. Here is how to customize your website’s web.
- Login to your Shopify account.
- Then click the online store option that place in sidebar.
- Once you click the online store, then you need to select themes.
- You can choose the available themes there or you can customized it. In this section, you can look at the free available them, browse the Shopify theme, upload them from a third party.
- When you have chosen the theme, you can click customize and you will be directed to the editing page.
- In the editing page, you can drag, drop down and also edit the themes too, tou can use all the editing tools there.
- Once you are done, you can click save.
For your additional information, you can change your theme at any time so you don’t need to worry because it is not permanent.
Add Sales Channels
How to master Shopify? You can master Shopify when you keep using it and before you can use it, you need to create your Shopify account. You can follow the tips on how to create a Shopify account to help you. As you know, you not only can sell in Shopify because Shopify lets you sell your business through social media platforms, websites and also ecommerce marketplace.
Do You Want to Manage Multiple Marketplace Just by Single Person?
Of course you can! You can handle multiple stores from all marketplace just by single dashboard. Cut your Business’s cost, and Boost your Efficiency at the same time.
Before you start selling your business, it is better to add your sales channels. To add your sales channels, you need to follow these steps such as:
- Select the “+” icon that place next to “Sales channels” in the sidebar menu.
- Choose the sales channel you willing to add up.
- For your information, every sales channel has different set up process but you don’t need to be worry because Shopify will lead you for it.
Add Products

The other steps you need to do after customize your website and add up your sales channel is Add your business products. It is easy to add products in Shopify, all you need to do is select products in the sidebar menu and then click Add product. Don’t forget to write your product description accurately because it will affect the Shopify shipping and also its shipping fee. Once you are done, click save.
Read also: Simple and Effective! How to List Products on Shopify
Set Up Payments

Before you can set up your payments, of course you need to know how to install Shopify and create your account first. Then you also need to take several steps above too before setting up payments. To set up the payments, you need to look at the left sidebar menu and click settings. You will see2 available options there such as Shopify payments or third party payment.
If you choose to use third party payment like Paypal, you will be charged a fee of 1% extra on Shopify’s main plan and additional 2% on the Basic Shopify plan. There will not be any when using the Shopify payment. Once you have decided, then choose “Complete account setup”.
Add a Domain
To add a domain, you have to select the domain under the online store menu. Then you are going to see 3 options there such as:
- Connect existing domain – If you have the domain already.
- Transfer domain – Help to transfer your existing domain.
- Buy a new domain – If you don’t have any domain.
If you don’t have any domain, you can search the domain names you want and select buy to buy a new domain for your Shopify.
Get Your Site Ready to Go Live
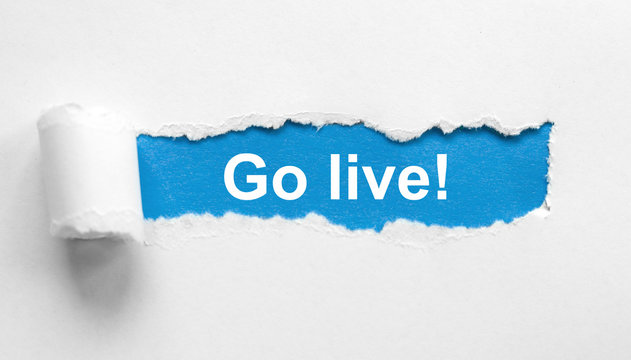
After your account is set, you can publish your business by going live. You have to go to settings, then click general and fill in the relevant data.
Pick a Plan and Make Your Store Public

Before you find out about Shopify print on demand, you need to pick a pricing plan first. Here are the available options such as:
- Basic Shopify – For a new user, you can choose basic Shopify with the rate of $29/month.
- Shopify – Suitable for more advanced features with the rate of $79/month.
- Shopify Advanced – Best option for fast-growing businesses with the rate of $299/month.
Read also: Create and Optimize Shopify Product Catalog, Full Guides!
Conclusion
Before you can use this Shopify platform, of course you need to set up your Shopify store first. Then follow the steps above to create a good business store.
Join Ginee Philippines!
Launch your Shopify store starting now and manage your stores easily with Ginee Philippines! Ginee can help you manage products, stocks, orders, promotions, chats, even ads campaigns in only a single dashboard. If you are struggling handling your online stores in Shopify ot other marketplaces, Ginee will be here. Join Ginee Omnichannel now!
Upload Products to Shopee and Lazada Automatically! How?
Ginee product management allow you upload products to all of your online stores from all marketplace just once! Save time, save cost, save energy, join Ginee Now!