Ginee
Ginee
 25-11-2021
How to create tags in Shopify? Managing a Shopify store on the Shopify app or website can be confusing and tiresome without organization. What better way to organize your store than with tags?
Tags sort your products and content on your Shopify store to help make it easier to manage your Shopify tag limit. You can create custom tags in specific sections of your store to arrange important details.
Tags can be easily created, added to specific posts, removed, searched, filtered and linked to multiple items or filter collection by tag. Once you’re familiar with tags, you can use ecommerce automation to automatically create tags.
How do i edit my tags on shopify? You can create a custom set of tags for each section in Shopify where tags are used. When you create a tag in a particular section, it isn’t copied to the other sections where tags are used. For example, you can organize orders by tags like packed or test but use tags like tax exempt or wholesale to describe some of your customers.
You may be interested in: 6 Effective Steps on How to Add Meta Tags in Shopify
What Does the Tags Do on Shopify?

Filtering systems which help users navigate items quickly and efficiently is a vital requirement for e-commerce stores that have a lot of product details and variations of a particular product type. Then the filtering systems on Shopify are often based on product tags.
Tags are searchable keywords involved in your products. You can use tags that save you a lot of time to label products, transfers, orders, draft orders, customers and blog posts based on type, vendor, price, weight or any fields.
In the wake of adding tags, you can help your customers search and filter your product through your online store search. In addition, tags also make it easier for you to generate Shopify auto tag products, which help you stay well organized when working in Shopify. Read more on our tutorials to learn about how to use tags on Shopify.
Do You Want to Manage Multiple Marketplace Just by Single Person?
Of course you can! You can handle multiple stores from all marketplace just by single dashboard. Cut your Business’s cost, and Boost your Efficiency at the same time.
How to bulk add tags in Shopify? Furthermore, tags on Shopify can also be used to help you bulk customize your products. For instance, if you add a clothes tag to your clothes items such as the word T-shirt, then you can create a product filter in the All Products list to show only products tagged with the word T-shirt.
Related: 2 Simple Methods on How to Add Quantity on Shopify
By this way, you can choose all those product tags contains Shopify and bulk hide them whenever you want according to your personal requirements.
Where Is the Tags Tab on Shopify?

Product tags example are labels to categorize a range of items like products, customer data, orders, blog posts, transfers, returns and more. With your selected tags, you can easily search and add filters on a drop down menu.
Transfer tags and organize different shopify product type without worrying about losing information. You can always see the full list of tags on your ecommerce store. The benefits of using tags are threefold: tags are invisible to customers, tags organize search results for users and you can organize the products page.
Shopify navigation filter with tags are used to categorize your ecommerce store’s products and customer information to improve the organization of your business. You can create a custom set of tags to specify information for your team to respond to inquiries about specific draft orders, it is also easy to change the name of the tag you create, add filters to a particular section and more.
Tags aren’t displayed to customers, but you can use tags to categorize products on your online store and organize search results for customers.
For example, at the end of the summer season, you can search for your products with the Summer tag in your Products page and use a bulk action to hide them from your sales channels.
How Do I Add Tags to Shopify?
Tags are used to categorize your ecommerce store’s products and customer information to improve the organization of your business.
You can create a custom set of tags to specify information for your team to respond to inquiries about specific draft orders, it is also easy to change the name of the tag you create, add filters to a particular section and more. Moreover, tags provide a cohesive way for ecommerce websites to enhance communication and marketing tactics.
It’s important to understand how to create tags in Shopify to manage your ecommerce store. Tags are easy to create and maintain to organize products, customer orders, blog posts, and more. With tags, you can easily improve the overall customer experience from placing an order, customer support, shipping and returns just to name a few.
While manual creation of tags is certainly viable, there are ways to automate the creation of tags in Shopify. With Alloy, Shopify merchants can set up workflows to create tags automatically. Alloy offers dozens of pre-built tagging workflows to help make tagging in Shopify easier to manage.
Here the 4 steps that you should know to how add tags on your Shopify:
Step 1: Open Product List

The first thing you have to do is to open a specific product page. Go to Products from your Shopify admin.
Step 2: Choose a Product
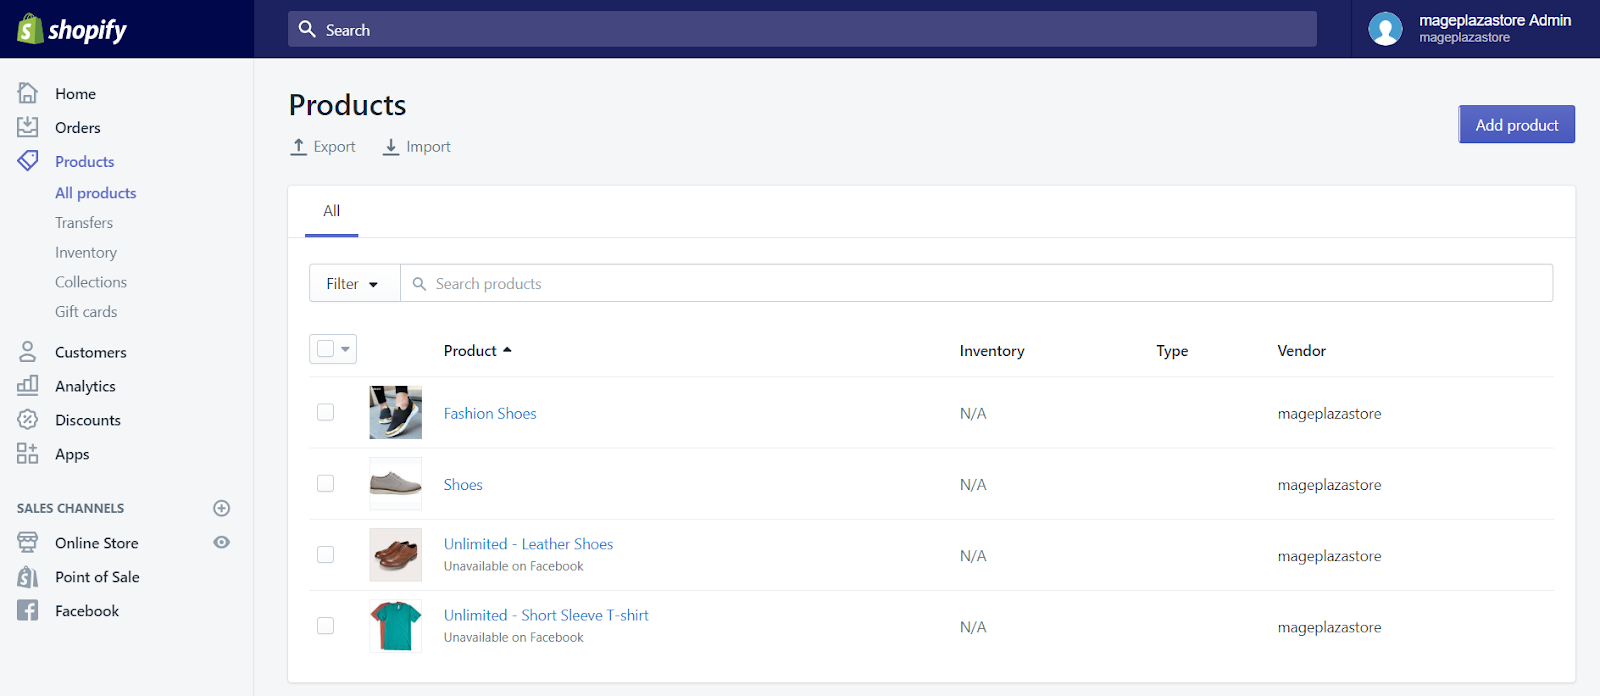
Then, click the name of a product you want to edit, or add a new product to your product list.
Step 3: Enter Tags

In the Tags section, you can enter the name of the tag you want to add in the box or choose the existing tags from the tag list in View all tags. Choose or enter tags for your product, using a comma to separate different tags. If the name tag you entered is a new tag, that tag will be automatically saved for future usage.
Your Selling Stock is Messing Up? You Need Help!
Ginee Omnichannel allow you to automatically sync every stock from all of your online stores. It’s faster way to helps you profit!
Step 4: Save The Tags
Finally, click Save to apply all the changes you made.
Conclusion
Try using tags best practices to group related items so you can view them all at once: orders using a particular shipping method, customers who accept email marketing, or products from a particular manufacturer.
Using tags frees up your team’s valuable time to focus on more pressing concerns. Whether tags are for marketing, customer data, shipping and fulfillment, loyalty and rewards, or store operations, you can benefit from the use of tags to organize your online Shopify store!
Ginee Philippines
To optimize your products and campaigns when selling online on Shopify, creating tags is important. But, other than that, you also need to manage the whole process of online business such as uploading products, responding to customers’ chats, managing ads campaigns, analyzing sales reports, and more.
No need to worry, Ginee Philippines is here to help you! You only need a single Ginee dashboard to manage all the processes. Ready to make your online business even more successful? Sign up to Ginee Philippines now, FREE!
Upload Products to Shopee and Lazada Automatically! How?
Ginee product management allow you upload products to all of your online stores from all marketplace just once! Save time, save cost, save energy, join Ginee Now!