Ginee
Ginee
 29-11-2021

How to set shipping in Shopify? Customer experience matters the most, from the time he visits your store to the time he receives the package, a lot can go wrong.
However, as a store owner, you do have control over all the processes which you can mold for the betterment of their experience. But when it comes to shipping, it may feel like you’re handling your brand reputation over to a stranger.
You may be interested in: Shopify Philippines: Set Up E-Commerce Website In No Time!
However, if you’re with proper knowledge on how to set up shipping on Shopify shipping apps, you won’t feel that way. After knowing about it completely and how to do it, you can carve out the perfect strategy which may meet customer satisfaction and expectations.
How Do I Change the Default Shipping Method in Shopify?
Each Shopify store comes with a default shipping profile, known as a general shipping profile. This general shipping profile comes with general shipping rates. For the businesses having simple shipping with limited location, this general profile and rates are often sufficient. But sellers generally create more profiles in order to offer accurate shipping prices.
The general shipping profile can be used for setting default shipping settings for your shipping. Products newly added or the products which are not in any custom profile will automatically fall in the general Shopify shipping profiles.
Related: 2 Simple Methods on How to Add Quantity on Shopify
After you understand the things on the grass root level, the next step is to learn how to set up Shipping on your Shopify store. Lets roll down step-by-step to achieve an upskilled shipping process to satisfy the needs of your business and consumers. Here the steps how to change the default shipping method in Shopify:
Add Shipping Locations
It is the location from where the orders will be shipped. By default, the original address that is entered as a location while creating a store is taken as your Shopify shipping policy location.
Your Selling Stock is Messing Up? You Need Help!
Ginee Omnichannel allow you to automatically sync every stock from all of your online stores. It’s faster way to helps you profit!
If you register any different location to ship or you have any fulfillment services to work on your behalf, then make sure to add them in locations.
If you’re a dropshipper and wondering how to set up shipping on Shopify for dropshipping, then you need not go the extra mile. You just have to select the app in the shipping section. If you’re using Oberlo for dropshipping, then you just have to select Oberlo in Shipping from this section.
Creating Shipping Profiles
As the Shipping profile is explained above, we are clear with what it is and its importance. By default, each Shopify store is built with one Shipping profile that contains the general rates.
For businesses with a simple shipping setup, creating general shipping rates is often sufficient. But for the stores that are enveloping a large audience from different locations, creating a shipping profile is mandatory as it widely helps in managing shipment and its cost.
Setting Shipping Zones
In simple words, a shipping zone is a group of countries or regions that are subject to the same shipping rate. Let’s say if you have your warehouse in the U.S., then you can create a Shipping zone comprising all the states. All the customers lying in that particular zone will be charged the same shipping rate.
You have to create shipping for the countries in which you want to sell. Customers lying within these zones will be able to receive the order.
Setting Shipping Rates
We have already discussed different shipping rates you can offer to your customers. Therefore, now the question that arises is how to set up shipping rates on Shopify?
Your Shopify shipping tracking profiles and zones should be ready before creating any shipping rates. So that you can set different shipping rates for different shipping profiles separately.
How Do I Set Shipping Rates?

How to set up flat rate shipping on Shopify? If you want to have different shipping rates for specific products or locations, then you need to create a new shipping profile. This option can be useful when you’re selling your own products and dropshipping Oberlo products on the same Shopify store.
For example, you can charge $2.00 USD shipping cost for Oberlo products and $5.00 USD for the products you ship on your own. If your customer purchases two products from different locations, then they receive a combined shipping cost of $7.00 USD in the checkout.
Choose Your Shipping Strategy
Before you set up your shipping Shopify settings in Shopify, you need to decide on your shipping strategy. These are the two most common shipping strategies:
Charge for the product and the shipping separately Include the potential shipping cost in your product price and offer free shipping Unexpected shipping costs are one of the top reasons customers abandon their carts. Offering free shipping is a great way to reduce carts from being abandoned.
Shipping costs can vary depending on the supplier and the destination country. To keep your shipping costs more predictable, it’s best to start selling to one or two countries and then expand once you’re comfortable with the dropshipping process.
Find Product Shipping Methods

When you purchase a product from a supplier, you must also pay the supplier for the shipping of that product. The shipping cost depends on the shipping method, product weight, and destination country.
Oberlo doesn’t import the product’s shipping method into Shopify, so you need to use supplier shipping methods to set up Shopify shipping for customers to choose during their checkout.
Do You Want to Manage Multiple Marketplace Just by Single Person?
Of course you can! You can handle multiple stores from all marketplace just by single dashboard. Cut your Business’s cost, and Boost your Efficiency at the same time.
Choose Your Shopify Shipping Settings Setup
To choose how to set up your shipping settings, you need to get familiar with the following Shopify shipping options. And here is also the ways of how to add multiple shipping options on Shopify:
Locations

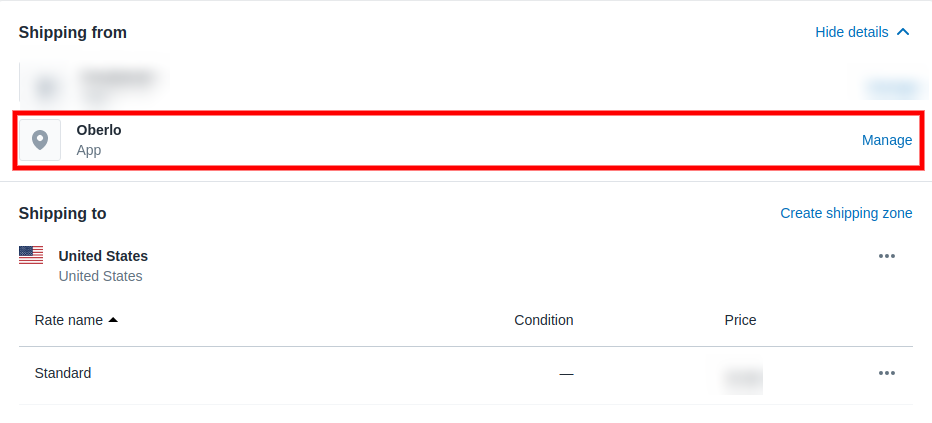
A Location in Shopify is a place where the products you sell are stocked. Oberlo products are assigned to the Oberlo App location in Shopify by default. When you set up your shipping settings, make sure that the Oberlo App location is listed in the Shipping from section so customers can select a shipping method and purchase from your store.
Shipping Profiles

In Shopify, you can use different shipping profiles to customize your shipping settings to suit your business needs. A shipping profile is a set of shipping settings for specific products and locations.
Every Shopify store is created with the General shipping rates profile that contains shipping rates for all your products. When you import a new product to your Shopify store, then it’s added to this profile.
Shipping Zones and Rates
Every shipping profile needs to have a shipping zone and shipping rate. A shipping zone is a group of countries or regions that have the same shipping options. These are the countries where you ship your products.
Shipping rates are the shipping options that your customers see at the checkout. You can set up a shipping rate name and how much you charge for this shipping option.
Set up General Shipping Rates

If you want to have the same shipping rules for all your products, then use the General shipping rates shipping profile. Here the steps:
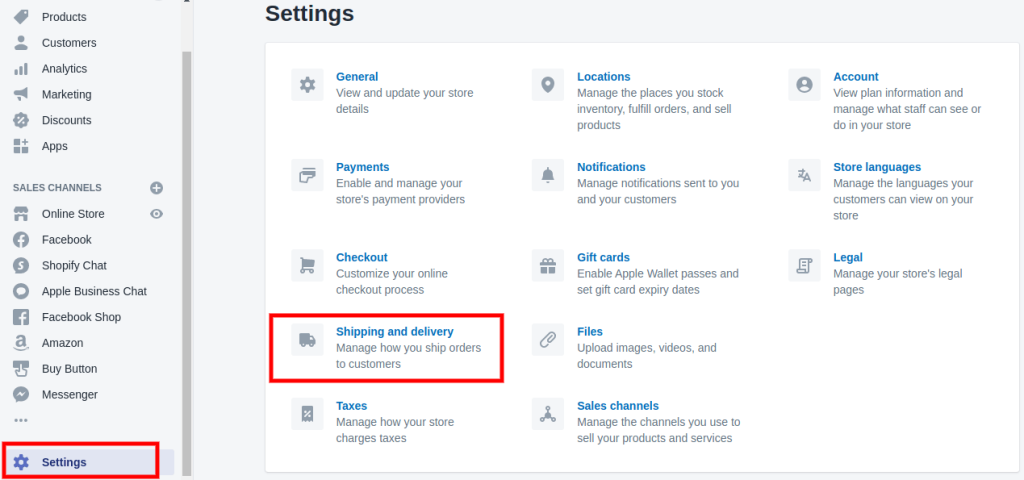
- From your Shopify admin, go to Settings > Shipping and delivery.
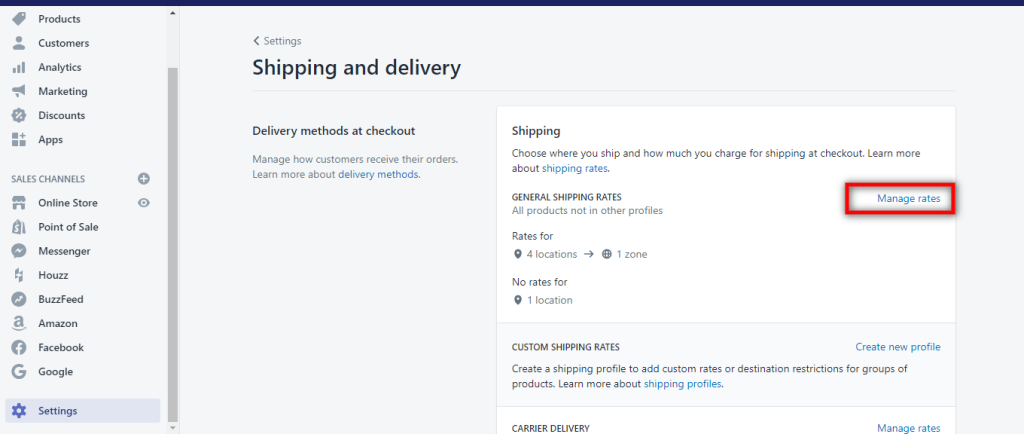
- In the General shipping rates section, click Manage rates.
- Make sure all the products you want to sell are in the Products section.
- In the Shipping from section, make sure that the Oberlo app location is listed. If Oberlo is not listed, then go to the Not shipping from section, click Add rates next to Oberlo. Select the rate you want to use and click Done.
- Optional: If you already have any shipping rates present in your shipping profile, then delete them. These are Shopify shipping calculator shipping rates that don’t work with Oberlo.
- In the Shipping to section, click Create shipping zone.
- In the Zone name field, enter a name to your new shipping zone.
- In the Countries field, select the countries you want to add to this shipping zone. To add all countries at once, select the Rest of the world.
- Click Done.
- In the section of the zone you created, click Add rate.
- Make sure that the Set up your own rates option is selected.
- In the Rate name field, enter a name for your rate that your customers will see at checkout.
- In the Price field, enter the shipping cost you want to charge your customers. To make shipping free, enter 0.00.
- Optional: Click Add conditions to customize your shipping rate based on product weight or order price.
- Click Done, and then click Save.
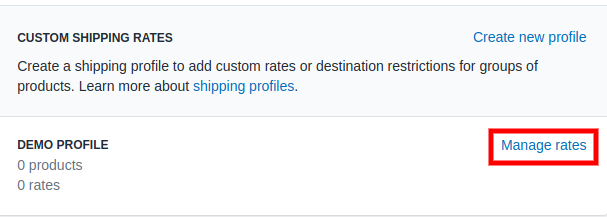
Set up Custom Shipping Rates

If you want to have different shipping rates for specific products or locations, then you need to create a new shipping profile. This option can be useful when you’re selling your own products and dropshipping Oberlo products on the same Shopify store.
Conclusion
You are not alone dealing with shipping hassles. You also aren’t alone looking for clear solutions for the same. This Shopify shipping guide must have cleared different aspects of shipping and how to set up shipping on Shopify so that you can now work on creating a successful shipping strategy for your Shopify business.
Ginee Philippines
If you want your online stores in Shopify to become successful, setting up shipping options on Shopify is very important. But, with Ginee Philippines, you can ship faster than ever and make your customers trust your brand more! Besides, Ginee Philippines can also manage your stores in a single dashboard. Sign up to Ginee Philippines now and enjoy Ginee features for free!
Upload Products to Shopee and Lazada Automatically! How?
Ginee product management allow you upload products to all of your online stores from all marketplace just once! Save time, save cost, save energy, join Ginee Now!