Ginee
Ginee
 22-3-2024
Before, Ginee WMS supports setting up pickers and using PDAs for picking. But, the Picking List needs to be printed before picking. Therefore, to reduce the paper costs, Ginee launched Picking with Pick Bin feature. After using the pick bin to pick products, the packer can quickly pack the products in the pick bin by scanning the Picking Bin Barcode, which will improve work efficiency.
Creating Pick Bin
- Can mass create up to 100 pick bins at once
- If the Quantity Created is more than 1, the Picking Bin Name will be auto-modified to “Picking Bin Name-Quantity”, such as PB-1, PB-2
- Under the same warehouse, the Pick Bin Name cannot be repeated. But, different warehouses are able to have the same Pick Bin Name

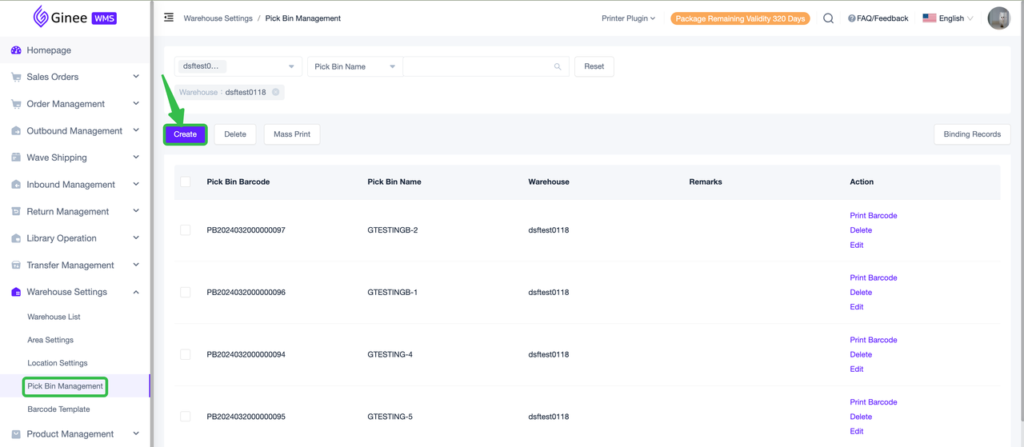
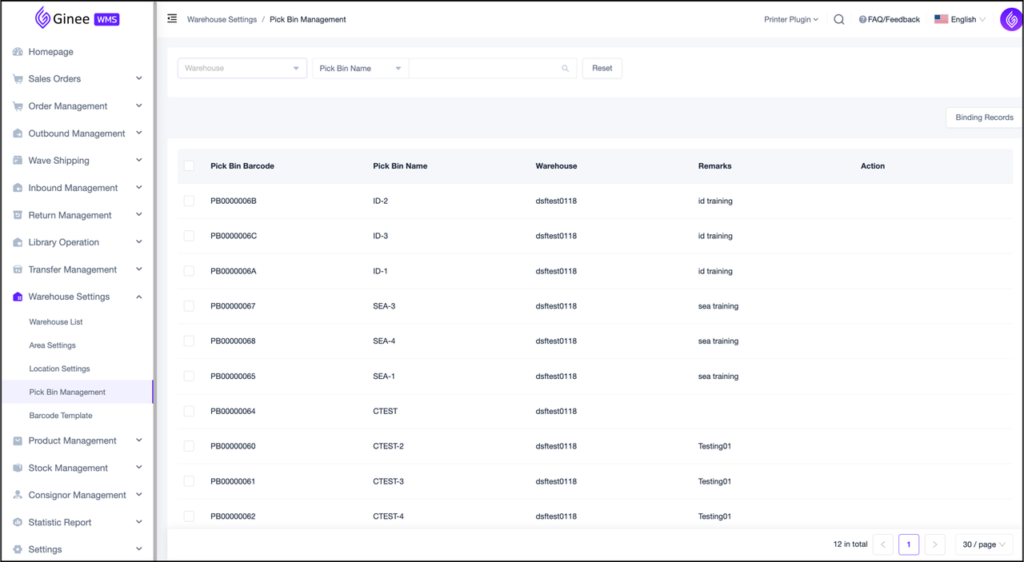
- Go to Warehouse Settings > Pick Bin Management > click Create
- Select the Warehouse (1) > enter Pick Bin Name (2) > enter Quantity Created (3) > enter Remarks (1), if there’s any > Click OK (5) after finished

- Pick Bin creation finished. The Picking Bin will now be displayed on the list
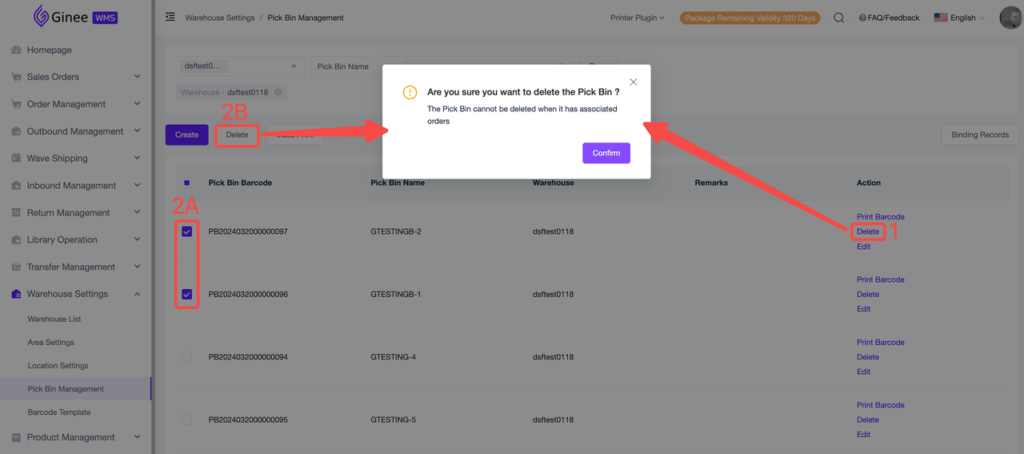
Deleting Pick Bin
- Only unbound Pick Bin can be deleted (Pick Bin that has order bound to it cannot be deleted)

- Go to Warehouse Settings > Pick Bin Management
- Single delete: click Delete (1) in the “Action” section > click OK (3)
- Mass delete: tick the Pick Bin you want to delete (2A), then click Delete (2B) above the “Pick Bin Barcode” section > click OK (3)
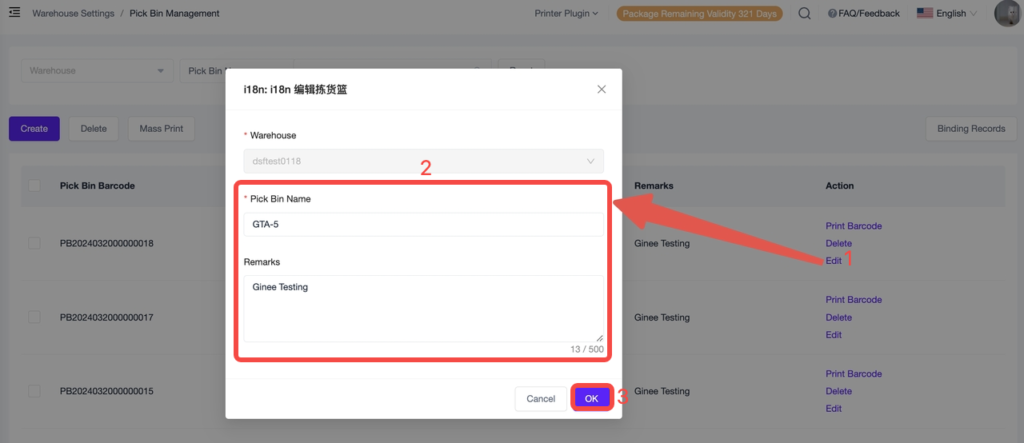
Editing Pick Bin
- Go to Warehouse Settings > Pick Bin Management
- (Only support single edit) Click Edit (1) in the “Action” section > edit the Pick Bin Name and/or Remarks as needed (2) > click OK (3)
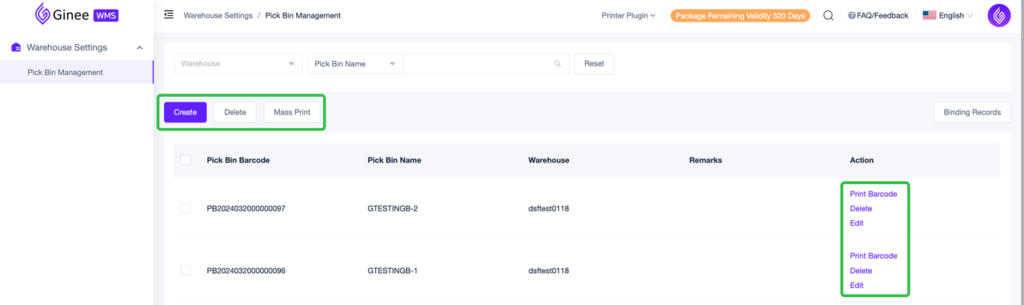
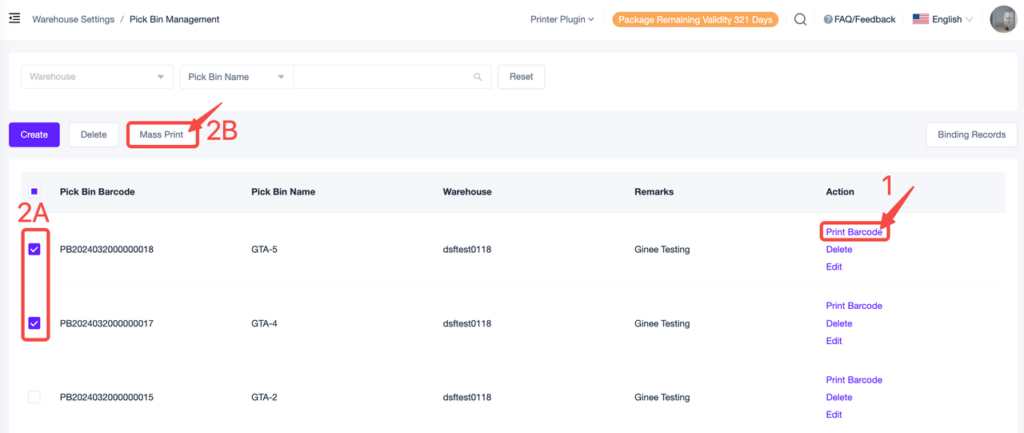
Printing Pick Bin Barcode
- Go to Warehouse Settings > Pick Bin Management
- Single print: click Print Barcode (1) in the “Action” section
- Mass print: tick the Pick Bin you want to print (2A) > click Mass Print (2B)
- The print preview will be opened in a new tab
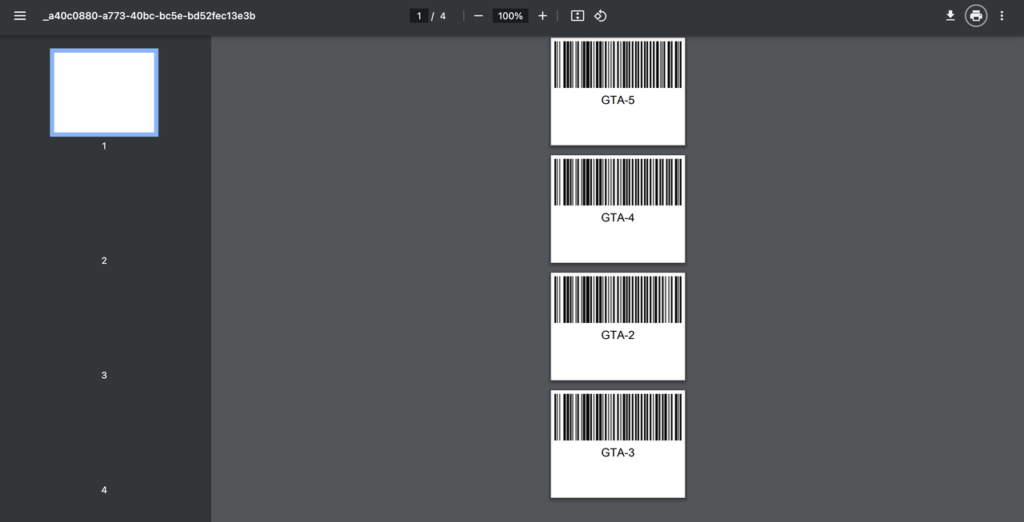
- After printing the Pick Bin Barcode, you can stick it to the pick bin
Binding a Pick Bin to an Outbound List (PDA Picking with Pick Bin)
- Can only be operated from the PDA (Does not support binding WMS Outbound List to Pick Bin from WMS website)
- Binding a Pick Bin to an Outbound List can only be done when picking the order (there is no other setting to bind them)
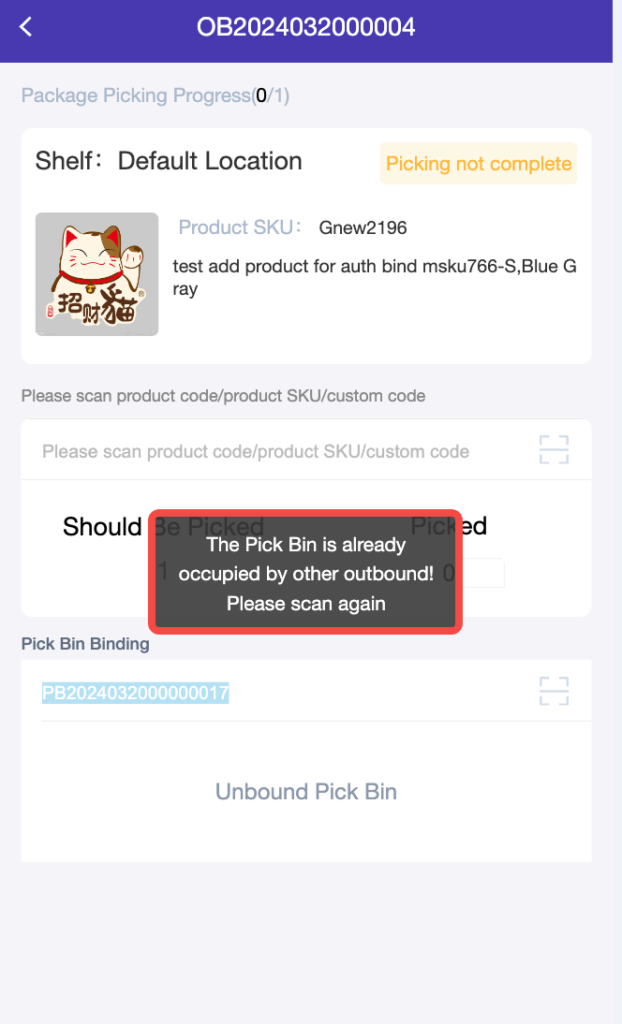
- One-to-one binding relationship: One Pick Bin can only be bound to one Outbound List at a time (Does not support binding one Pick Bin to multiple Outbound List, or binding one Outbound List to multiple Pick Bin)
- Only Outbound List in “Picking” status support to be bound to Pick Bin. If the Outbound List has entered “To be Packed” status, binding is not supported
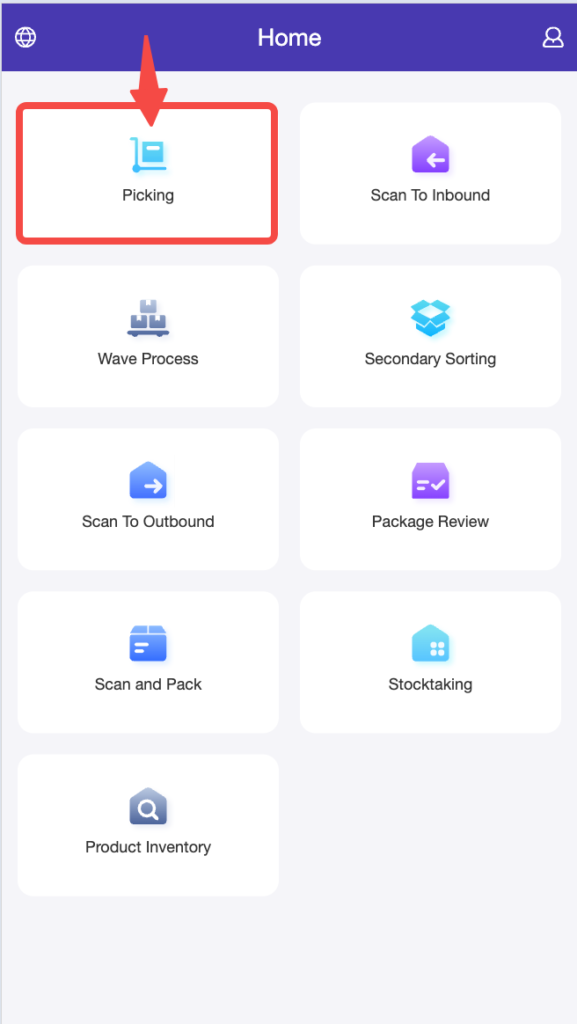
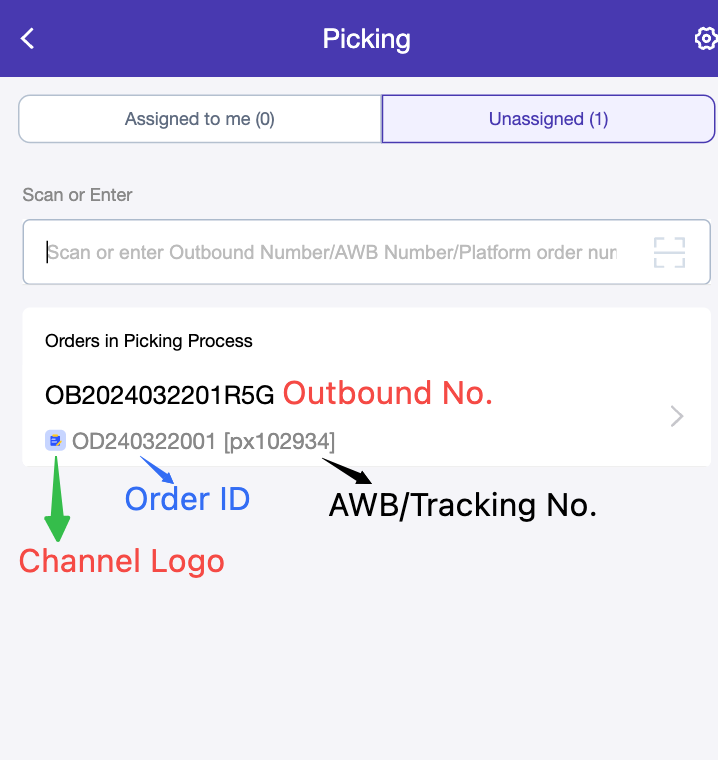
- Login to Ginee PDA, go to Picking
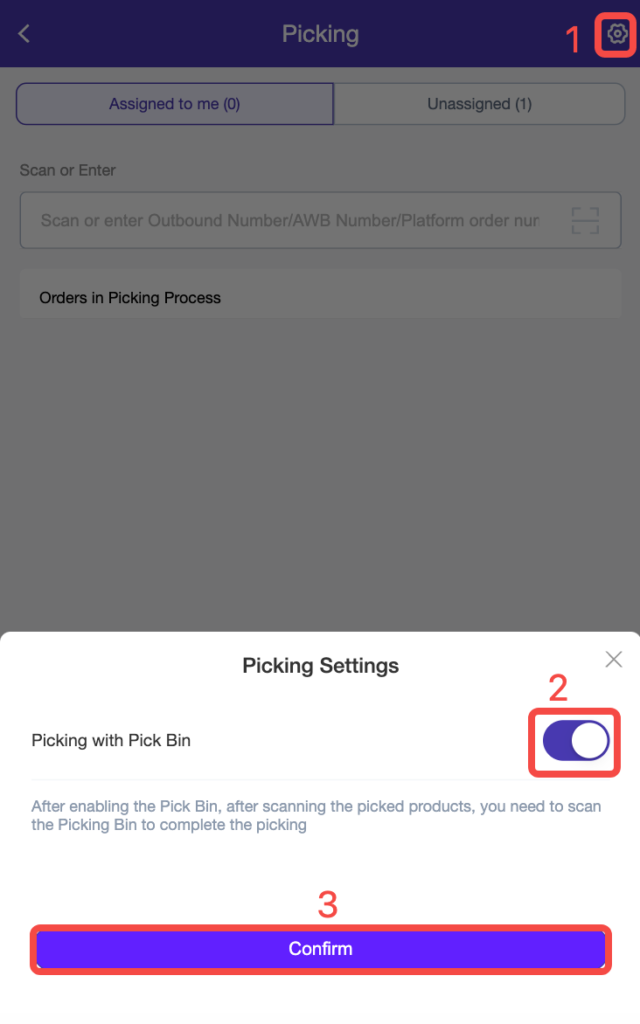
- Click the Settings symbol on the upper right corner (1) > enable the Picking with Pick Bin switch (2) > click Confirm (3)
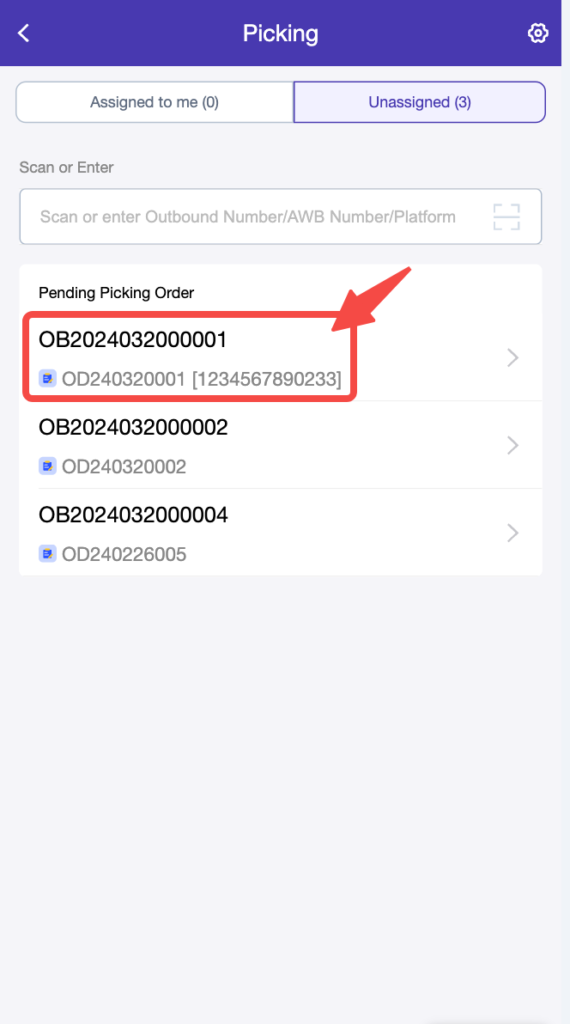
- To start picking, click on the Outbound List you want to pick
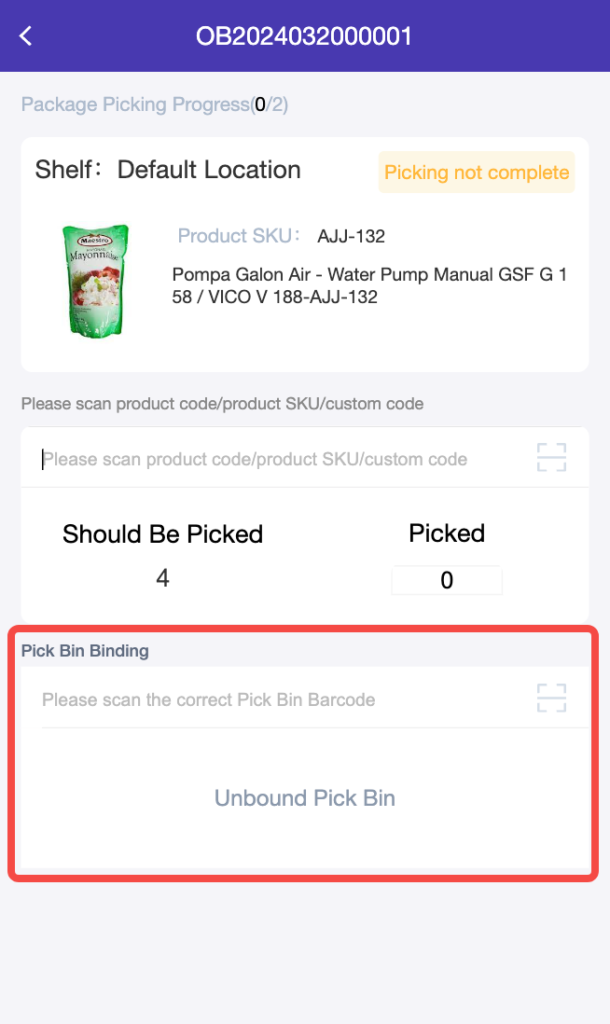
- Start picking by scanning the product as usual
- Scan the Pick Bin Barcode to bind it to the Outbound List
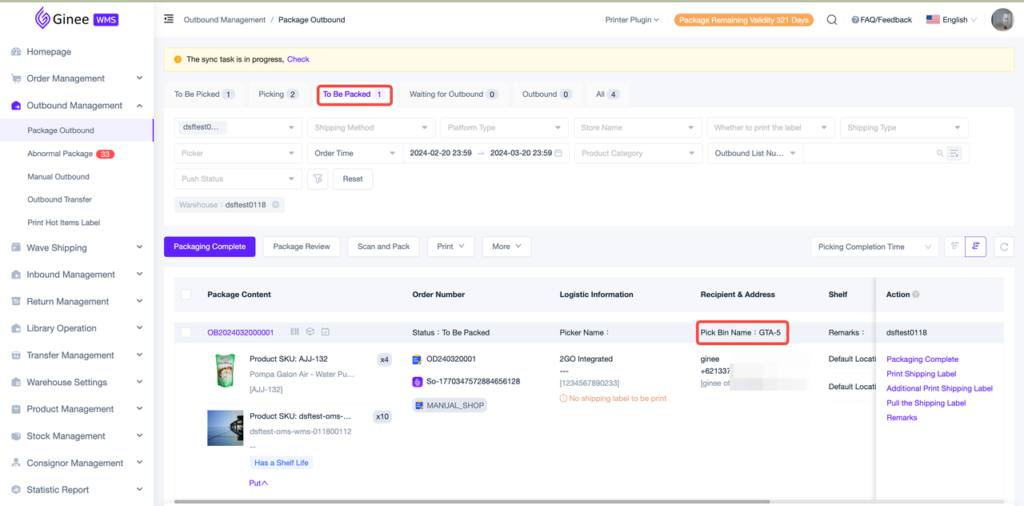
- Picking Completed. The Outbound List will now move to “To Be Packed” status with Pick Bin Name displayed
– Pick Bin Name will only be displayed in the “Picking” and “To Be Packed”, and “All” tabs (Orders in “To Be Picked” status still have no Pick Bin bound to them. Orders in “Waiting for Outbound” already unbound the Pick Bin)
– If there is a Pick Bin that has been bound to the Outbound List, Pick Bin Barcode can be scanned/entered to search for the Outbound List
Unbinding a Pick Bin to an Outbound List (PDA)
- Manual unbind: by clicking the “Unbind’ button in the order
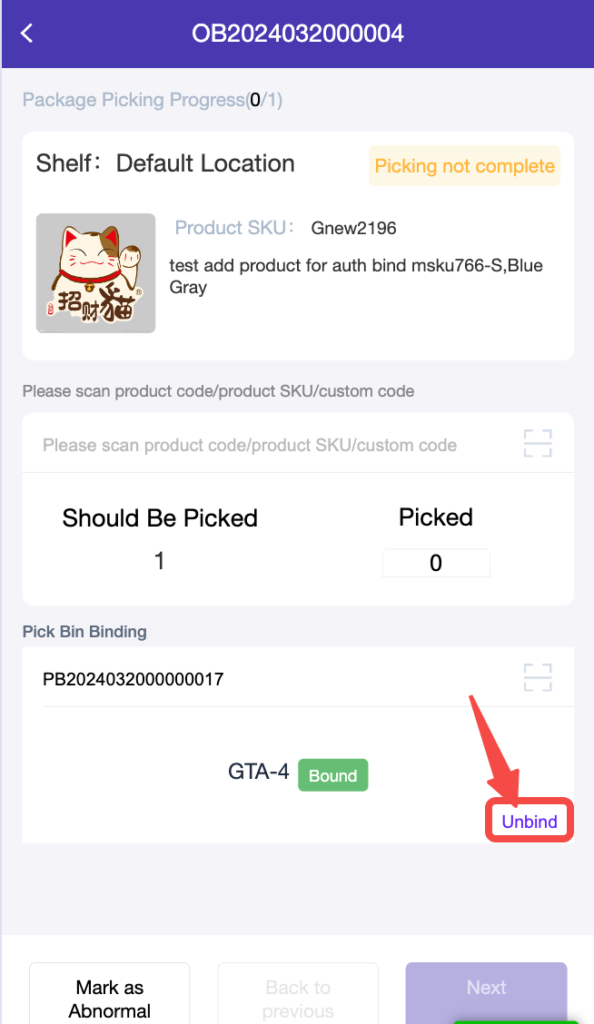
- Auto-unbind: When the Outbound List status changes to “Waiting for Outbound”, the Pick Bin will be auto-unbound from that Outbound List, and then the Pick Bin can be bound to another Outbound List again
Binding Records
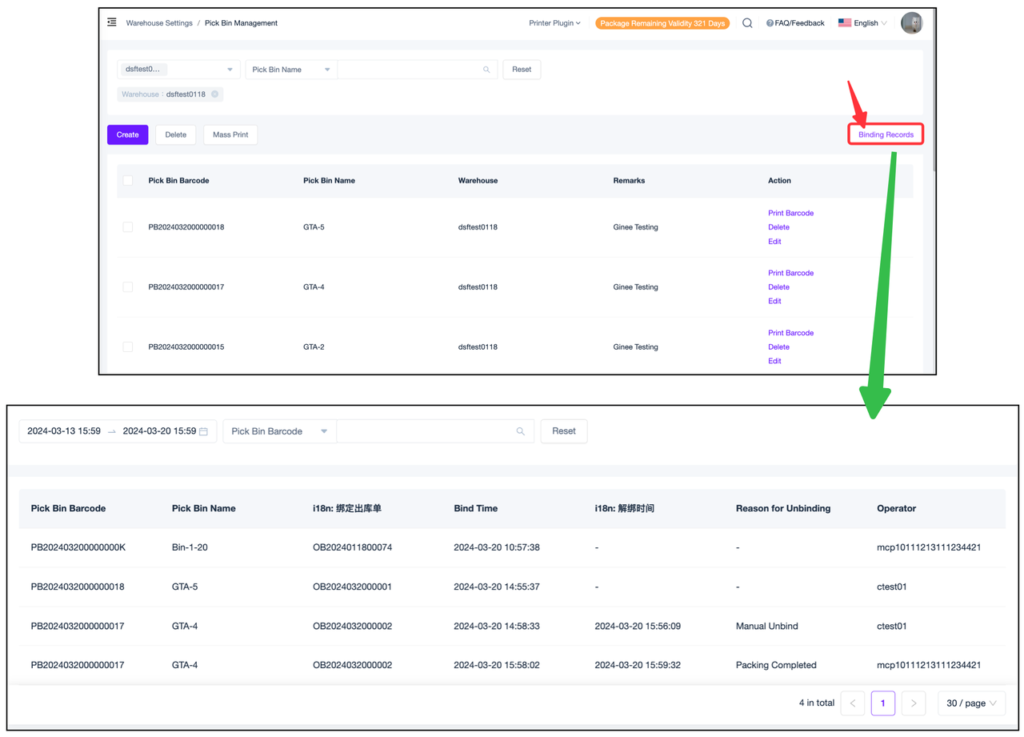
- Only supports records for the last 7 days (including that day)
- Reason for Unbinding:
1. Abnormal packages are automatically unboun
2. Packing Complete
3. Manually Unbin
4. Manually marked the order as Abnormal, automatically unbound
PDA Package Review
- If there is a Pick Bin that has been bound to the Outbound List, Pick Bin Barcode can be scanned/entered to search for the Outbound List
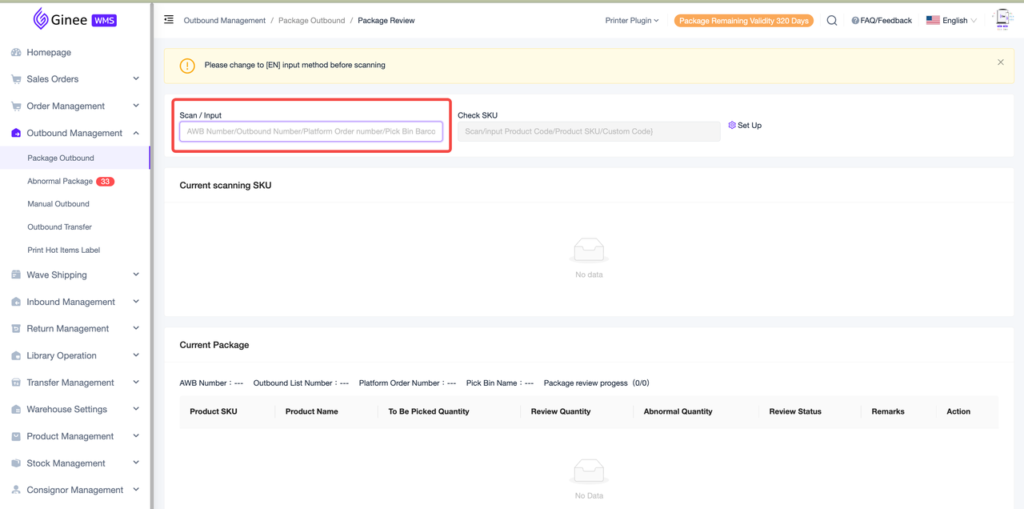
WMS Package Review
- If there is a Pick Bin that has been bound to the Outbound List, Pick Bin Barcode can be scanned/entered to search for the Outbound List
PDA Scan and Pack
- If there is a Pick Bin that has been bound to the Outbound List, Pick Bin Barcode can be scanned/entered to search for the Outbound List
WMS Scan and Pack
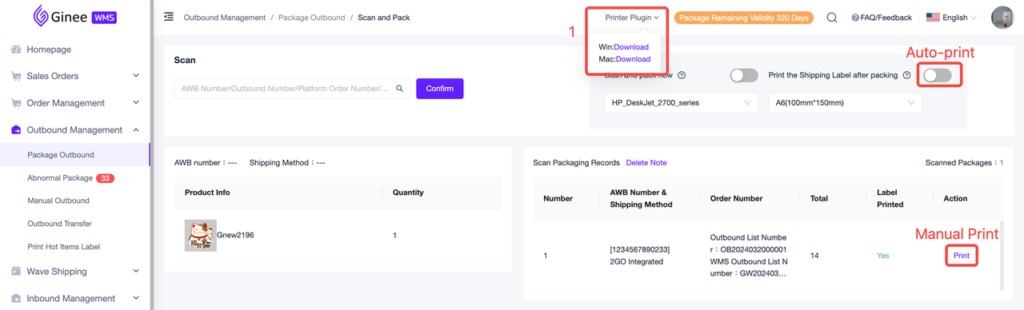
- If there is a Pick Bin that has been bound to the Outbound List, Pick Bin Barcode can be scanned/entered to search for the Outbound List
- Support printing Shipping Label directly from Scan and Pack page
- If you haven’t installed the printer plugin, please install it first by clicking “Printer Plugin”
- After enabling the “Print the Shipping Label after packing” switch, the Shipping Label will be printed immediately after each package is packed
- Click “Print” to manually single print the Shipping Label
– Label Printed: No (Shipping Label is not printed), Yes (Shipping Label has been printed)
Role Settings
- Binding Records is available to everyone, no need to set permission
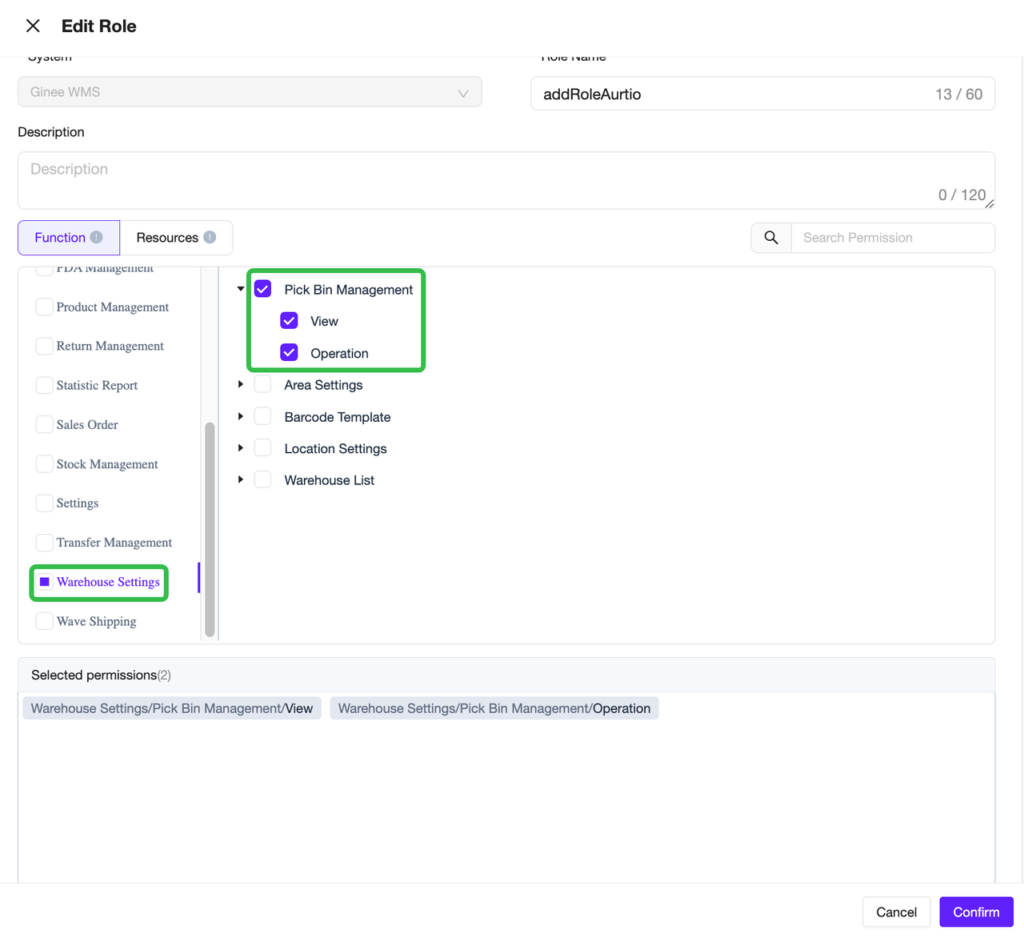
- Select Warehouse Settings > Pick Bin Management > View and/or Operation
A. View: give permission to access the Pick Bin Management menu and view the data only. Only data with warehouse permissions can be viewed
B. Operation: includes creating Pick Bins, editing Pick Bins and deleting Pick Bins