Ginee
Ginee
 28-6-2022

You’re a busy entrepreneur running an ecommerce business, and researching the best catalog for optimizing your Shopify store takes time. There are many catalog templates you can see as inspiration to your catalog in Shopify. But how if you already made one and want to edit your catalog similar to the template you see? You can learn how to edit catalog in Shopify in this article.
Creating an online store is one of the best ways to get started with an online business. Shopify’s presence now makes it easier for anyone to set up an online store. This eCommerce platform is well-known for its simple features for setting up an online store.
Your Selling Stock is Messing Up? You Need Help!
Ginee Omnichannel allow you to automatically sync every stock from all of your online stores. It’s faster way to helps you profit!
Shopify’s comprehensive features, of course, make it simple for anyone, including you, to launch an online store and start running an online business right away. So let’s start editing your catalog and add products to it.
Read also: Create Affiliate Links Shopify and Set up to Your Store
How Do I Edit My Catalog Page on Shopify?
Every Shopify store lists all of the store’s visible products in a page at the URL your-store.com/collections/all Shopify. This is the catalog page for the store. If you ever see a Shopify catalog template, and want to make it similar, you should change your catalog page. You can switch to the Shopify catalog mode to see exactly how your catalog looks like.
Products on the catalog page are displayed alphabetically by default. You can control the order in which your products appear on this page by creating a collection. If you want to share your catalog, you do not need any Shopify catalog API.
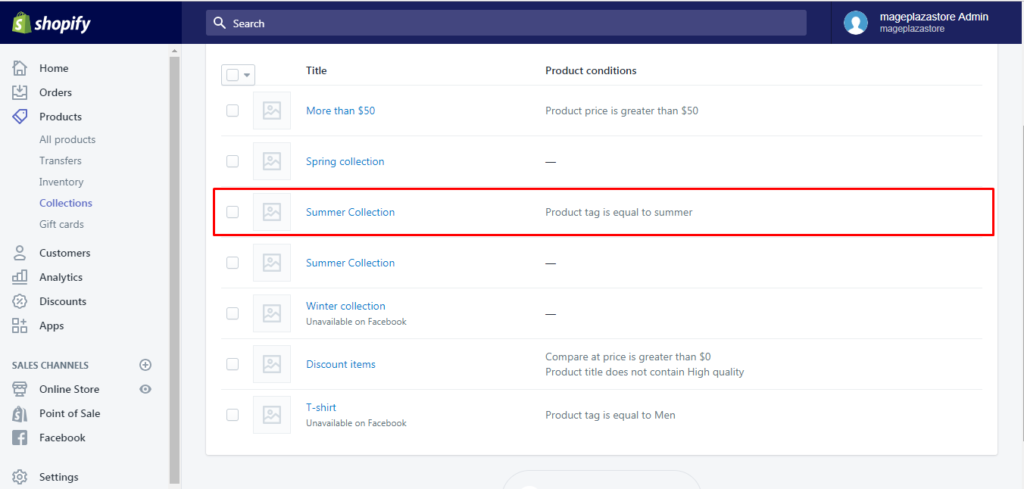
You can make a collection with the handle all to control the order in which products appear on your catalog page. Here are the steps to edit Shopify edit all collections page.
- In your Shopify admin, Go to Products > Collections.
- Select the Create collection option.
- Make a collection:
- Make the title of your collection All.
- Select Automated in the Collection type section.
- Configure the product condition The product cost more than $0.
- Optional: To hide out-of-stock products, add the condition Inventory stock is greater than 0 as well.
- Choose Save.
- You can now sort the products in your All collection after you’ve created it. Scroll down to the Products section and choose a Sort option from the drop-down menu.
- If you choose Manually, you can rearrange your products by dragging and dropping their drag and drop handles.
- If you want to change the title of your All collection, you can do so now that it’s been created. It is critical, however, that the collection’s handle remains set to all. Scroll to the Search engine listing preview section and click Edit website SEO to confirm this.
- You should see a URL that ends in /all in the URL and handle text box. If the URL ends in something other than /all, change it to /all and save.
Do You Want to Manage Multiple Marketplace Just by Single Person?
Of course you can! You can handle multiple stores from all marketplace just by single dashboard. Cut your Business’s cost, and Boost your Efficiency at the same time.
Changes to the order of your products in this collection will be reflected on your online store’s catalog page.
How Do I Change the Catalog Text in Shopify?
Catalog is used to show your products in other social media, for example in Shopify product catalog Facebook. To see your Shopify catalog ID, you can go to your Facebook Business Manager, click More Tools, Commerce Manager, Settings, Catalog, and you will find it here. Catalog text in Shopify can be changed. You can change the catalog text using the desktop or Shopify app. Here is how to change a collection’s name or description on the desktop.
- Go to Products > Collections in your Shopify admin.
- Select the collection you want to update by clicking its name.
- Enter a new title or description on the collection details page.
- Choose Save.
Meanwhile, if you want to change the text in the Shopify catalog app using the Shopify app, here are the steps.
- Go to Products > Collections in the Shopify app.
- Tap the collection you want to change.
- Select the pencil icon or Edit button in iPhone.
- Change the title or description.
- To save your changes, click the check mark or Save button on the iPhone.
Read also: Create and Optimize Shopify Product Catalog, Full Guides!
How Do I Add Products to My Catalog on Shopify?
If you start a new business, now you are ready to bring your products to the Shopify store and your catalog as well. You need to enter every detail of your products so you can choose what’s important for your business.
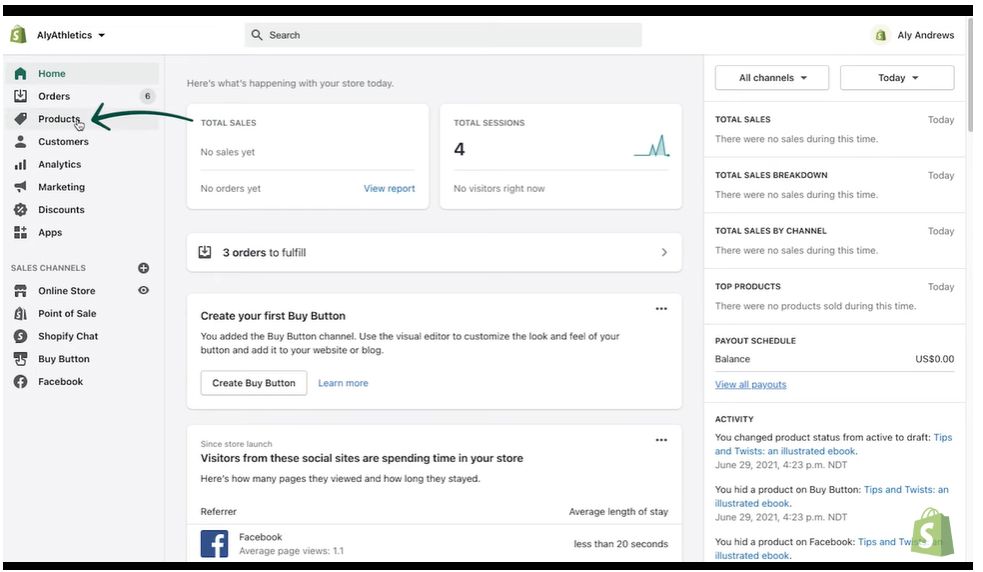
- Go to Products in your Shopify admin.
- Click Add product from the Products page.
- Enter a title for your product, description as well as any additional information. Descriptions inform and persuade customers to make a purchase. Descriptions also help with the Search Engine Optimization also known as SEO. By adding a description and details, you are helping your customers find your products easier.
- Add media of your product. You can add them by dragging and dropping the files, selecting them from your computer, or by adding a URL. Visuals help your customers decide if they want to make a purchase, so it is best to have a visual for all your products.
- Add the price. This is what customers pay at checkout. The Compare at price is the original price for a product that’s on sale. For example, if you enter $30 as the Compare at price, and leave the price at $20, the product displays as $10 off.
- Click Save.
Conclusion
Every Shopify store has a page at the URL your-store.com/collections/all Shopify that lists all of the store’s visible products. This is the catalog page for the store. To edit your catalog, you can make collections of your products in your Shopify admin.
To add products to your catalog, you need to add your products first in Shopify. You need to enter every detail of your products so you can choose what’s important for your business.
Join Ginee Philippines!
After you set up and edit catalog in Shopify and add products to it, the next step is to manage your online stores because if you manage it well, you can increase more sales and buyers easily. Relax, Ginee Philippines can help you. With Ginee, you can manage products, stocks, orders, promotions, chats, ads campaigns, accounting reports, and more only in a single dashboard. Join Ginee Philippines now freely!
Upload Products to Shopee and Lazada Automatically! How?
Ginee product management allow you upload products to all of your online stores from all marketplace just once! Save time, save cost, save energy, join Ginee Now!