Ginee
Ginee
 29-5-2022

Adding a Shopify custom font is one way to differentiate yourself from the competition. It’s a great way to build your brand while also improving the appearance of your Shopify storefront. Add custom font Shopify will help to distinguish your store.
Make sure the font you choose reflects who you are and what your business is about. Use of aesthetically pleasing but difficult-to-read fonts will detract from the value of your content. It’s best to use legible fonts that are slightly simpler. Here is the detailed explanation about how to add a custom font Shopify and upload it to your theme.
Your Selling Stock is Messing Up? You Need Help!
Ginee Omnichannel allow you to automatically sync every stock from all of your online stores. It’s faster way to helps you profit!
Read also: Shopify Philippines: Set Up E-Commerce Website In No Time!
How Do I Add Fonts to Shopify Theme?

Do you want to add custom font to Shopify Debut theme and the other theme? The following instructions will show you how to use fonts from the Shopify font library in your theme:
- Add a Shopify font picker type setting to the theme editor to allow merchants to select their font. This setting’s value is returned as a font object. Try again if you experience Shopify font picker not working.
- To load the selected font or any of its variants, use one of the font filters listed below:
- To insert the default @font-face declaration, use the font_face filter.
- To create a custom @font-face declaration, use the font_url filter to access a CDN URL.
- To access font variants from the same family, use the font_modify filter. Bold and italic stylings are two examples.
- Set any specific CSS stylings, such as font-family, font-weight, and font-style, by referencing the chosen font.
Uploading Your Font
Add Google font to Shopify tutorial is provided below. This tutorial will show you how to add a custom font to Shopify. To ensure success, make sure to follow the steps exactly. To begin, you must first place the font in your theme’s Assets folder.
- Download your font’s webfont version. WOFF and WOFF2 file types must be present in the font files (TTF or OTF are not webfont file types).
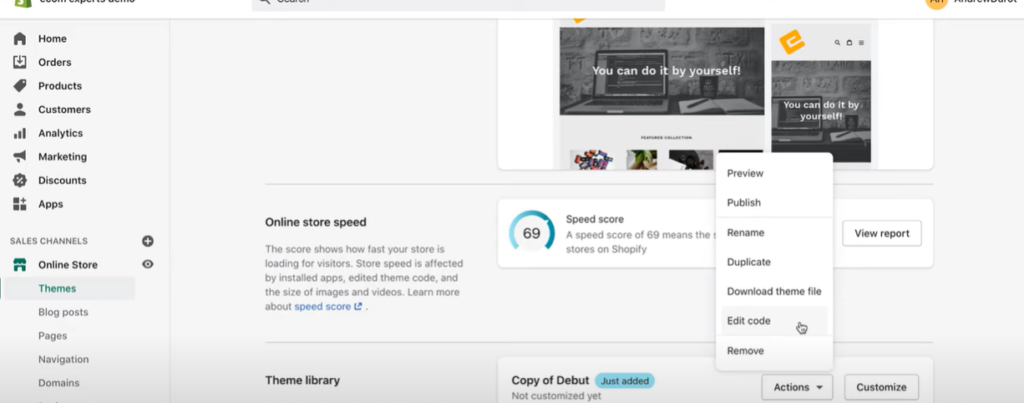
- Navigate to your Shopify dashboard to access your theme’s Assets folder. Go to Online Store > Actions > Edit Code from here.
- Scroll down to the Assets folder and click Add a new asset, then select your font file and click Upload asset.
Installing Your Font in Your Theme
Next, to change font Shopify, tell your theme that it can use the font file you uploaded.
Do You Want to Manage Multiple Marketplace Just by Single Person?
Of course you can! You can handle multiple stores from all marketplace just by single dashboard. Cut your Business’s cost, and Boost your Efficiency at the same time.
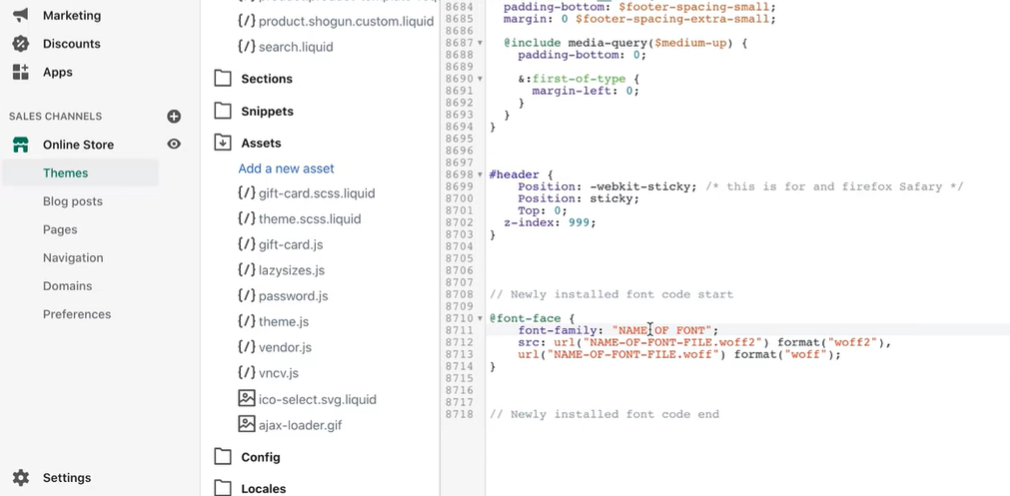
- Navigate to the main CSS file for your theme (usually named styles.scss.liquid, theme.scss.liquid, or another variation of this). This file can be found in your theme’s Assets folder; navigate to the bottom of this file to insert new code into your theme.
- Add the code below, replacing the highlighted code elements with actual data.
- Font name: the name of the font; if the font has more than one word in its name, “quotation marks” are required; these are also required when inserting into Shogun.
- Filename: the name of the recently uploaded file to your theme, including the file extension, such as cosmic_sans_bold.ttf.
- Format: the format of the font that was uploaded, for example, “TrueType” for Athena.ttf.
| @font-face { font-family: “Font name”; src: url({{ “Filename” | asset_url }}) format(“Format”);} |
- Now that the font has been installed, you must use code to tell the theme which headings or text will use your new font. Go to your website in a new browser tab and find the heading or text you want in this font, in this case a heading. Inspect the words by right-clicking on them.
- A window will appear displaying the site’s code. Look for the CSS code that is styling your heading in the right-hand column. In the example above, the heading is a on the left, highlighted in grey, and the CSS property selector for the heading is h1, .h1, h2, .h2, h3, .h3, h4, .h4, h5, .h5, h6, .h6 on the right. Copy the text by clicking the property name.
- Return to the browser tab containing the theme code editor and open the theme.scss.liquid file once more. Choose the text “your CSS selector here” and paste what you’ve already copied. Then, replace “Font name” with the name you previously used.
- Save your changes, then refresh your website to see your custom Shopify fonts.
Font formats supported include “woff”, “woff2”, “truetype”, “opentype”, “embedded-opentype”, and “svg”.
Adding Your Font to Shogun
Add custom font to Shopify Dawn theme already done, what should I do next? Once your font has been added to your theme, you can enter the Font-Name that specified above into your Shogun dashboard’s settings.
Click Settings
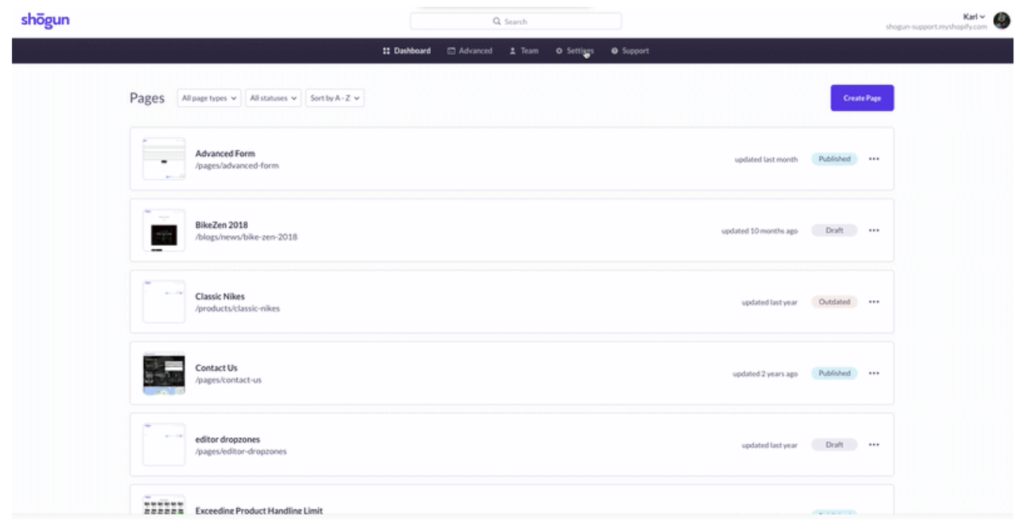
First of all, click Settings on the top of the page in the Shogun dashboard.
Enter Fonts
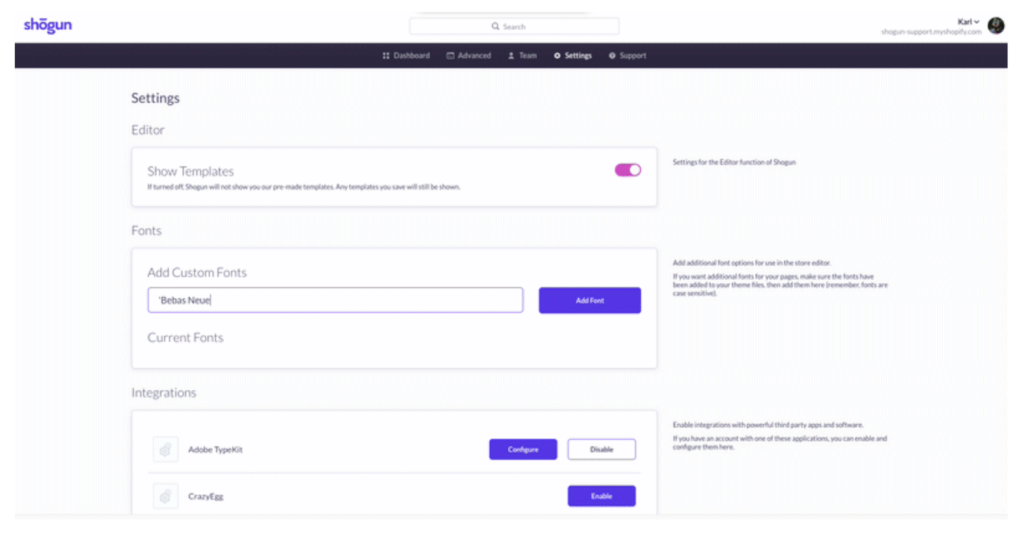
Enter the font name you want to use in the Add Custom Fonts field (at the bottom). Case, spelling, and syntax are all considered when naming the font. It should be identical to how the font-family is specified in the font’s CSS. Some fonts have single quotation marks around them (for example, ‘font name’); these should be included in the font name field. But if you need to add Adobe font to Shopify, you can simply enable the integration.
Click Add Font
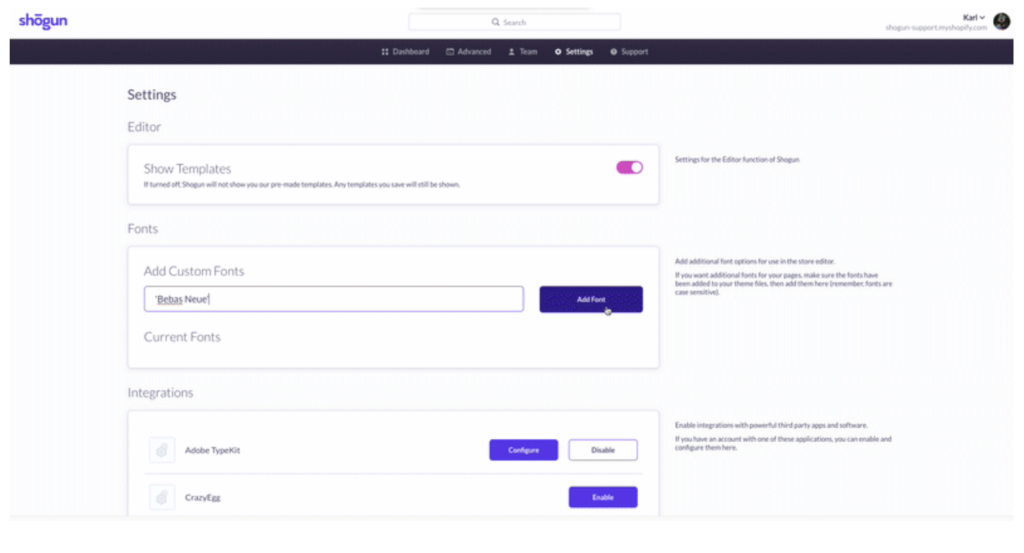
After entering the font name, click on the Add Font button to save your update.
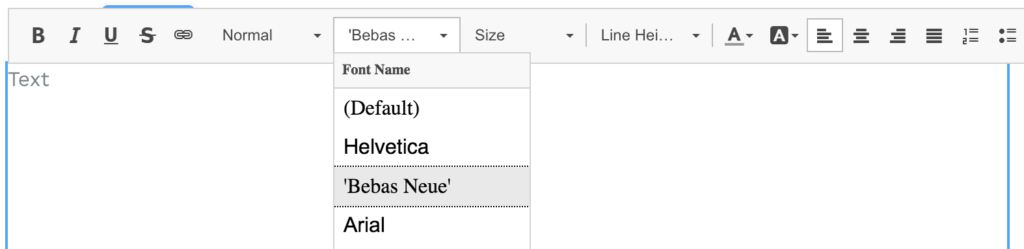
When you add a Custom Font to your Shogun settings, it will appear as an option in the element’s font menu.
Read also: 4 Tips How to Make Sales Shopify Less than 30 Days
Conclusion
It has never been easier to add a custom Shopify font into your theme. Custom fonts can now be uploaded to Shopify. Using a custom font in Shopify will make your Shopify store more distinct and appealing to your customers. Using the right font combination can elicit specific emotions in your customers and potentially increase your conversions. You can also draw attention to the items you want your customers to see.
Join Ginee Philippines!
After setting up your custom font Shopify, you must optimize your online stores in Shopify with the help of Ginee. You can integrate your stores to Ginee and let Ginee help! With Ginee, you are able to manage products, stocks, orders, promotions, ads campaigns, chats, and more in only a single dashbaord. Join Ginee Omnichannel now freely!
Upload Products to Shopee and Lazada Automatically! How?
Ginee product management allow you upload products to all of your online stores from all marketplace just once! Save time, save cost, save energy, join Ginee Now!