


 Ginee
Ginee
 5-4-2021
Using the “Customer Management” feature helps you manage customer information effectively. Here, you can view customer details, edit customer information, or even delete customer information for those who have never made transactions. You can also easily observe the purchasing patterns of specific customers, including total purchases, transaction order count, and order details for specific transactions.
A. Exporting Customer List
– If you use specific filters, you will only download customer information based on your applied filters
– Maximum of 10,000 data/download
1. Customers > Customer List > Export > Export by Selected (1B) if you have ticked the specific customer (1A) or Export All (2) to export all customers
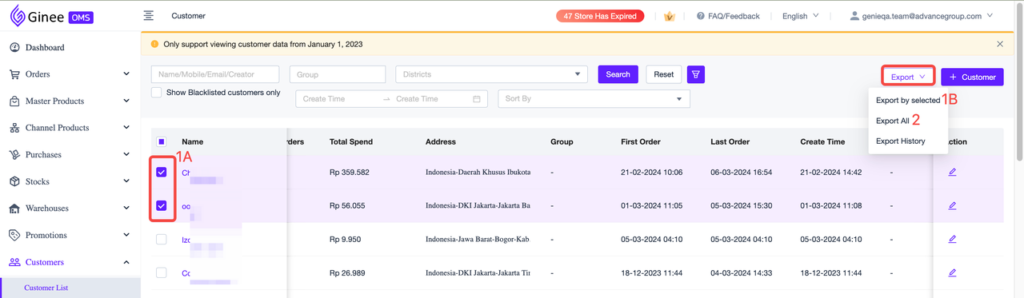
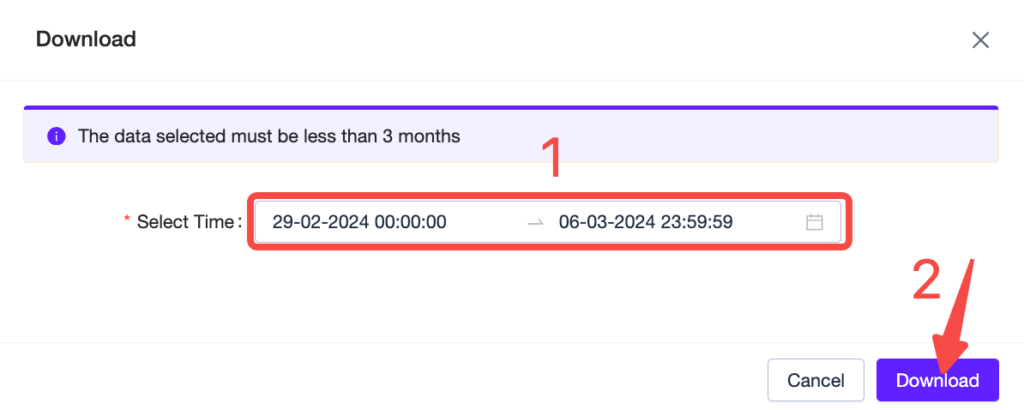
2. For Export All, the customer list will be downloaded based on their Creation Time. Click Download after selecting the time
B. Deleting a Customer
– Currently, you can only delete customers who have never made transactions
Tick the customer you want to delete (1) > click Delete (2) > click Delete (3) on the pop-up notification

C. Adding a Customer
For offline stores, if you have loyal customers, then you may consider adding their information manually, so when creating manual order or POS order, you can directly select from the existing customer list
1. Customers > Customer List > +Customer
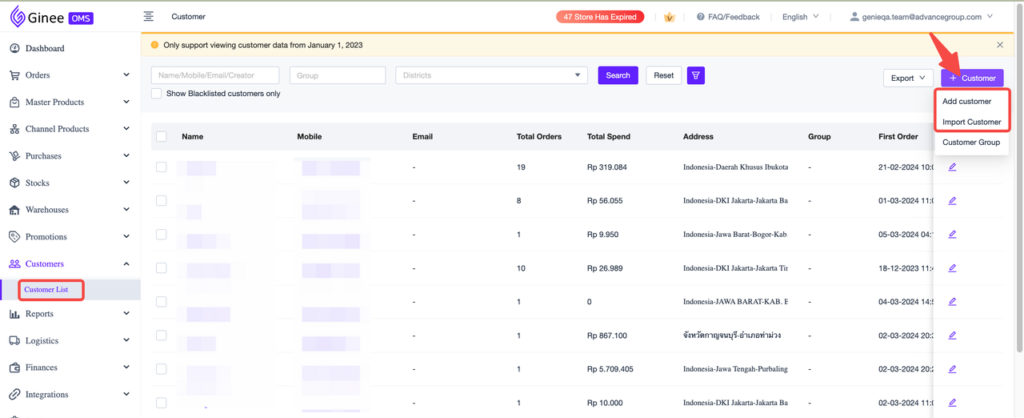
2. You can add the customer by manual adding or importing
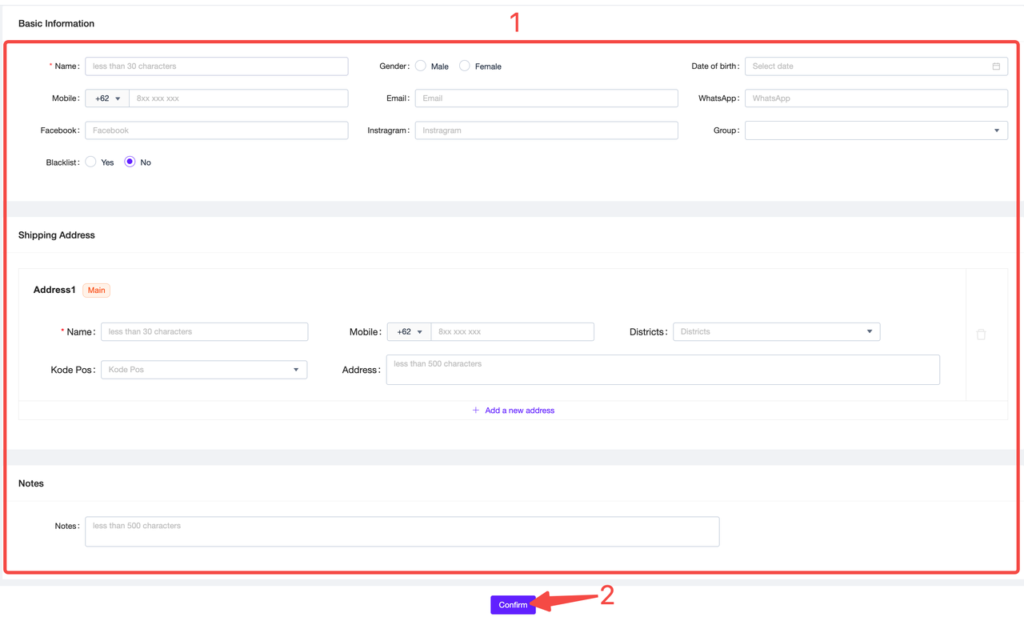
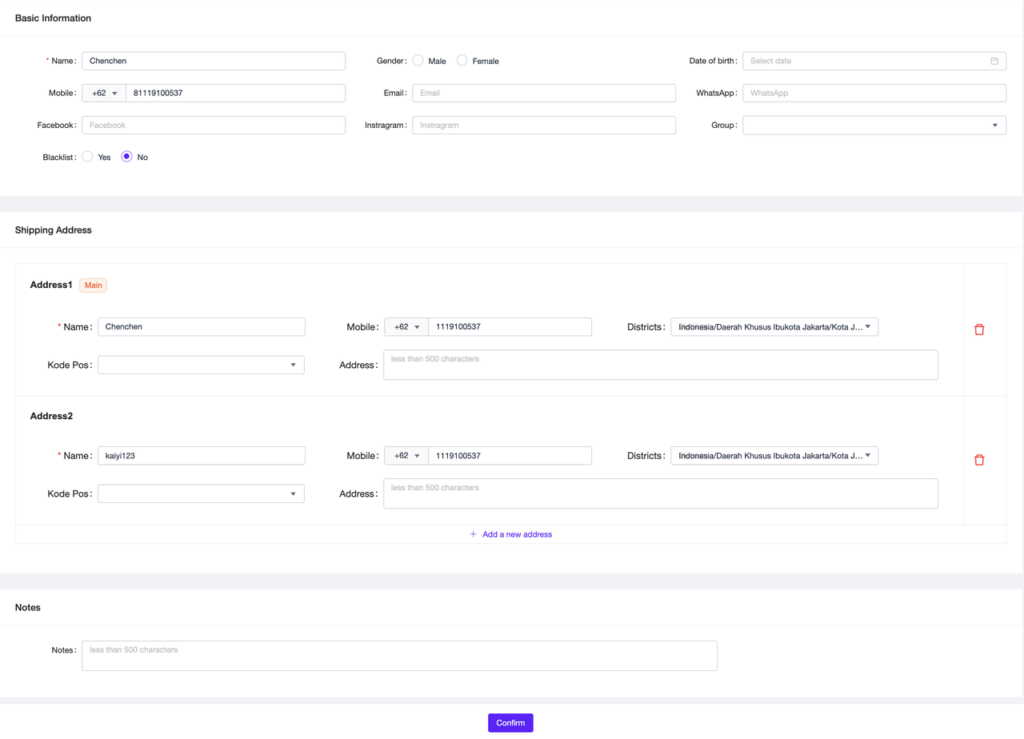
A. Add Customer: Single-adding customer
– Selecting Add Customer will bring you to a page to fill out the customer information
– Once finished, click Confirm and it should appear in your customer list
B. Import Customer
– For Import Customer, first download the template provided
– Then fill in the customer information (please pay attention to the Import Tips)
Import Tips:
1. Name is required and must be less than 30 characters
2. Mobile must begin with 8, contains 9-12 numbers
3. Only Indonesian addresses can be added, addresses must be less than 500 characters;
4. If there’s any customer who has two or more addresses, please enter into two rows
5. If Mobile is not empty, CallingCode is required, and the value is one of +62/+63/+86/+66/+84/+60
6. Supports setting up blacklisted customers when importing, 1 means blacklisted and 0 means not blacklisted. If it is blank, it means that the default setting is not blacklisted

– Upload the filled file and it should appear in your customer list

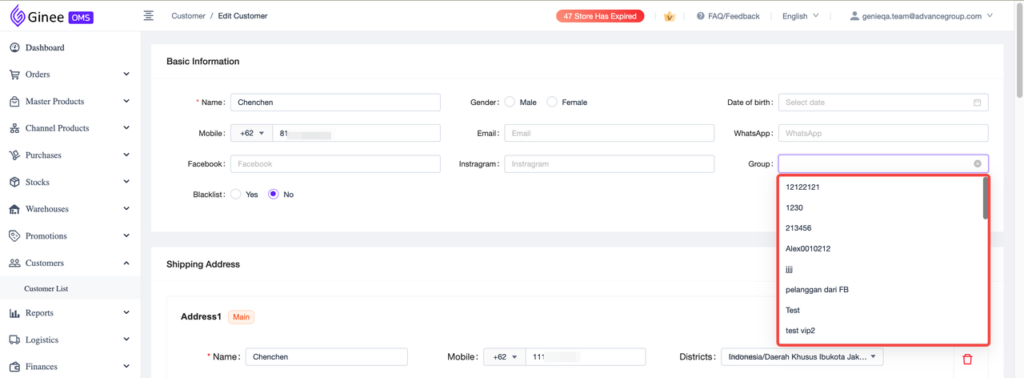
D. Editing Customer Information
1. Click the pencil logo
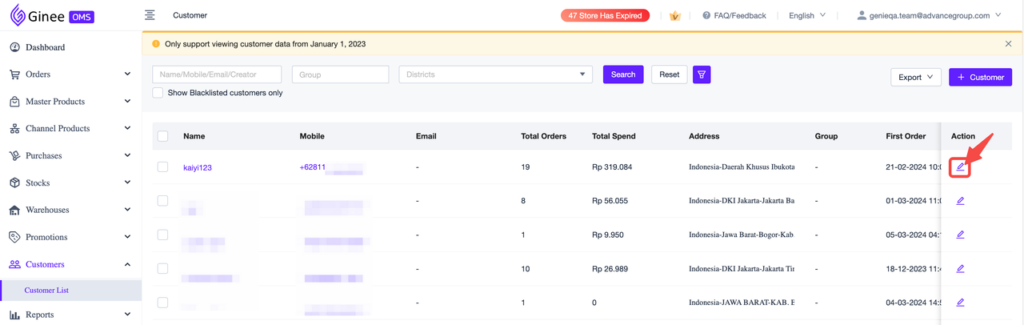
2. Edit the information as needed > Confirm
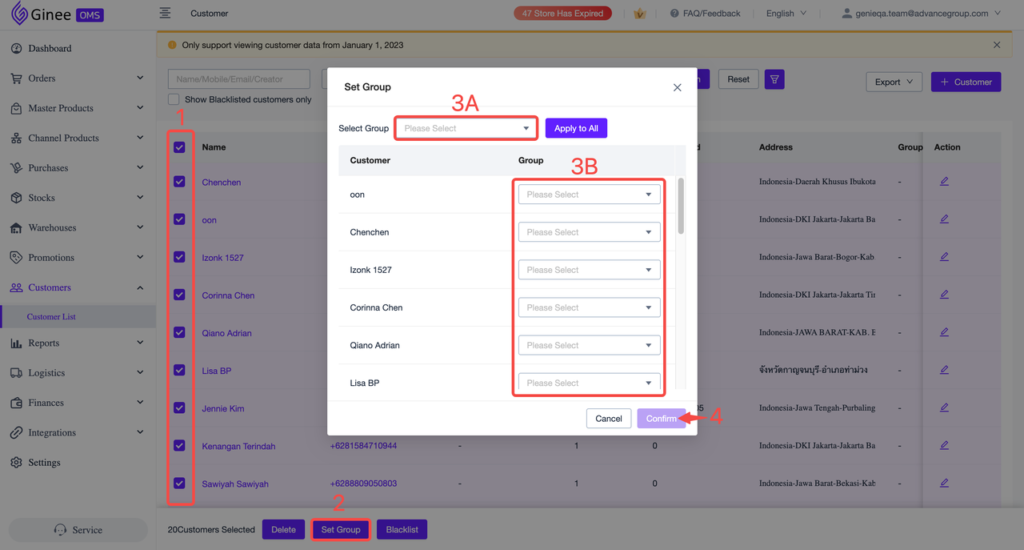
E. Customer Grouping
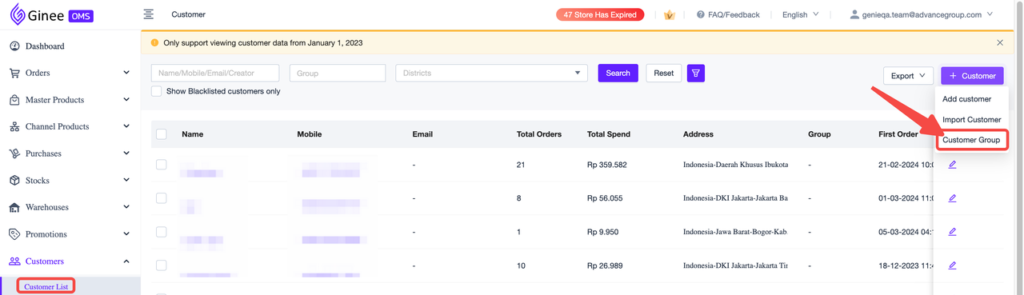
1. First, you need to create the Customer Group. Go to Customers > Customer List > +Customer > Customer Group
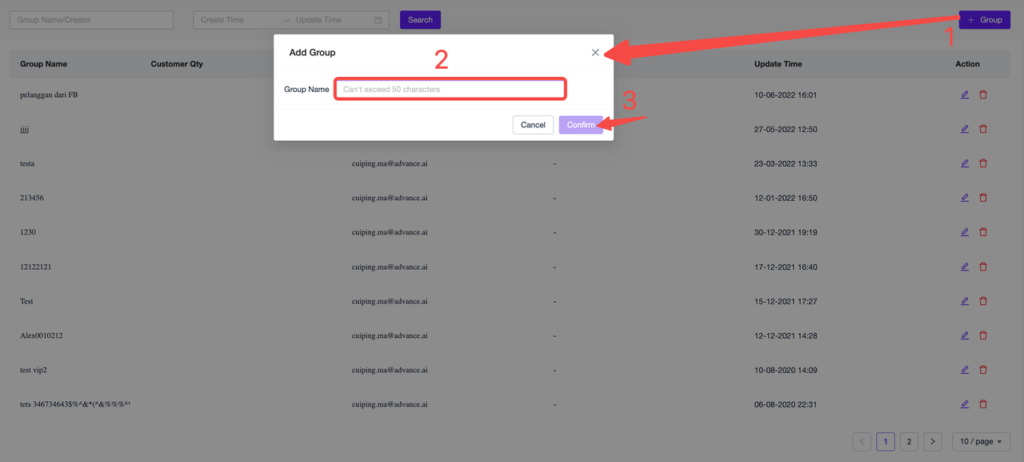
2. Click +Group (1) > Input the Group Name (2) > click Confirm (3)
3. Tick the customer (1) > click Set Group (2) > Mass select group (3A) or Single add group (3B) > Confirm (4)
You can also add group when adding or editing a customer
NOTES
Shopee, Tokopedia and Tiktok Shop censored Buyer Name and Phone Number, so they won’t appear in Customer List at all


