Ginee
Ginee
 1-10-2021
New User Guidance
For new users, please follow these steps below to get started.
Step 1: Login to Your Account and Set Language
We will provide user login path and account. User can set system language according to their own needs
Step 2: Set a New Warehouse
Login to your account > Go to “Warehouse Settings” module > Create a Warehouse > Fill in Warehouse Information
Step 3: Set Product Area and Location
After location is created, product can be shelved to the corresponding location and the picking list can be located to the corresponding location for picking;
How to set Product Area: Warehouse Setting > Area Management > Create Area > Create Name (Custom)
How to set Location: Warehouse Setting > Location Management > Create Location > Create Location Name (Custom)
Step 4: Create Product
(1) OMS/ERP Push Product
After OMS/ERP created the product, it will be automatically pushed to WMS
Note: Merchant’s product is created in the OMS/ERP system and OMS/ERP cannot modified after being pushed to the WMS
(2) Manually Create Product
Step: Product Stock > Create Product
Manual Guide
Order Management
Feature Overview : This module is mainly provided for the higher-level staff in the warehouse, mainly responsible for processing orders pushed from ERP/OMS system to WMS, as well as processing abnormal orders in the warehouse.
1. WMS Order Status
| Status | Description |
| Pending | OMS/ERP push order to WMS and wait for the warehouse admin to issue the tasks to the warehouse workers. |
| Shipping | After the warehouse manager has issued the tasks, the orders are waiting to be outbound |
| Completed | Completed outbound orders |
| Abnormal | Abnormal orders in the warehouse operations |
| Cancelled | Canceled orders in order management |
| All | Order with all status |
Step 1: OMS/ERP push order to WMS, click “Ship” to issue the tasks
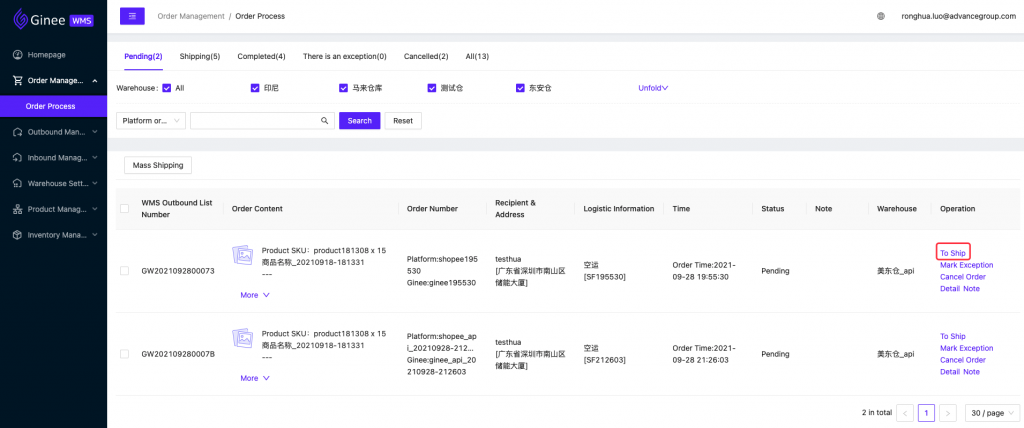
Step 2: The order is moved to Shipping

Step 3: After the order is shipped successfully, the order is moved to Shipped
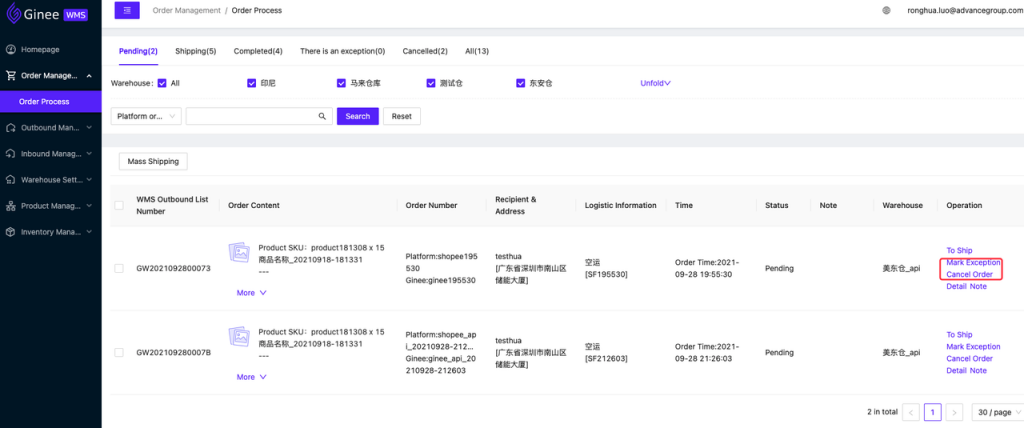
Abnormal Operation:
- When an order has an abnormal, for example, the customer needs to change the order, the abnormal needs to be marked
- After customer cancel order on the platform, WMS operator will cancel the order
Outbound Management
1. Package Outbound
Feature Overview: In this module, after the warehouse administrator sent out the warehouse task, the warehouse worker will shipping order
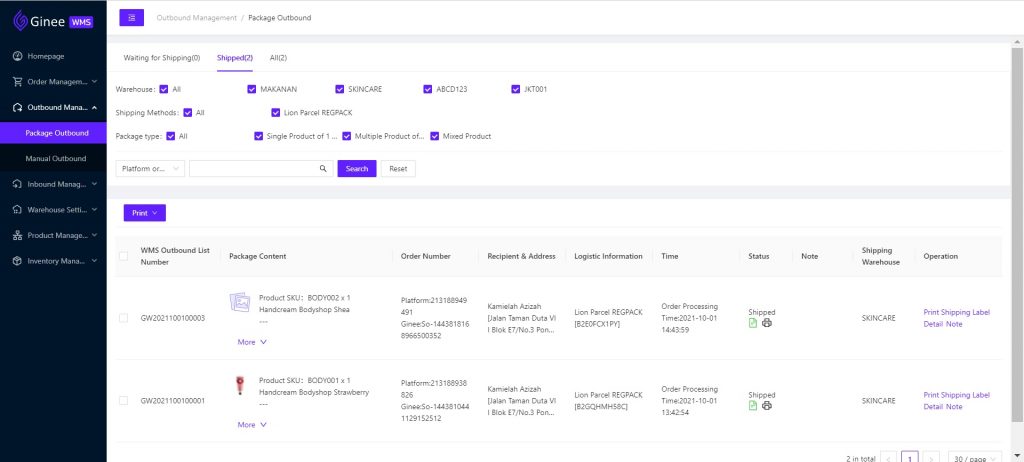
Step 1: After picking and packing, the warehouse administrator will click “Shipping”
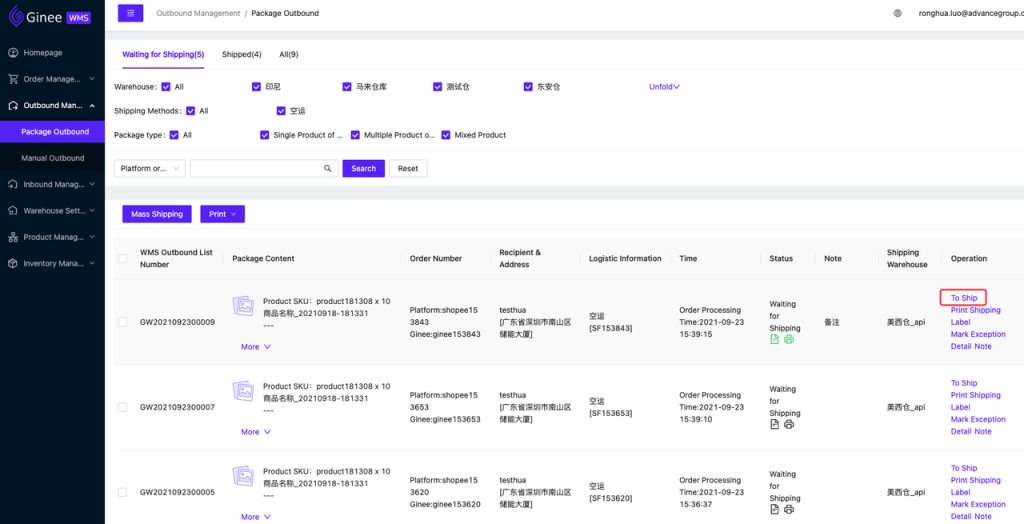
Step 2: After Shipping completed, you can check the shipped orders here

2. Manual Outbound
Feature Overview: In daily warehouse operations, you need to adjust the stock in the warehouse. In this module, you can create the Outbound List
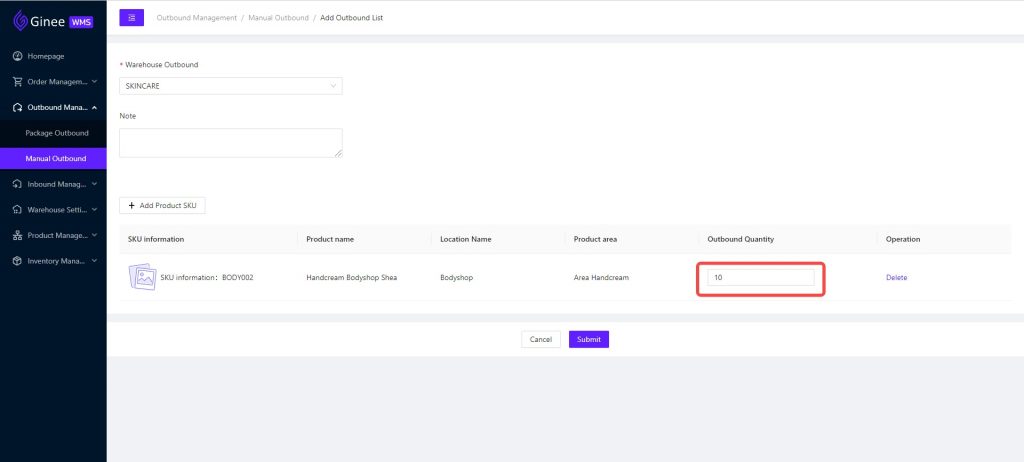
Step 1: Click Add Outbound List
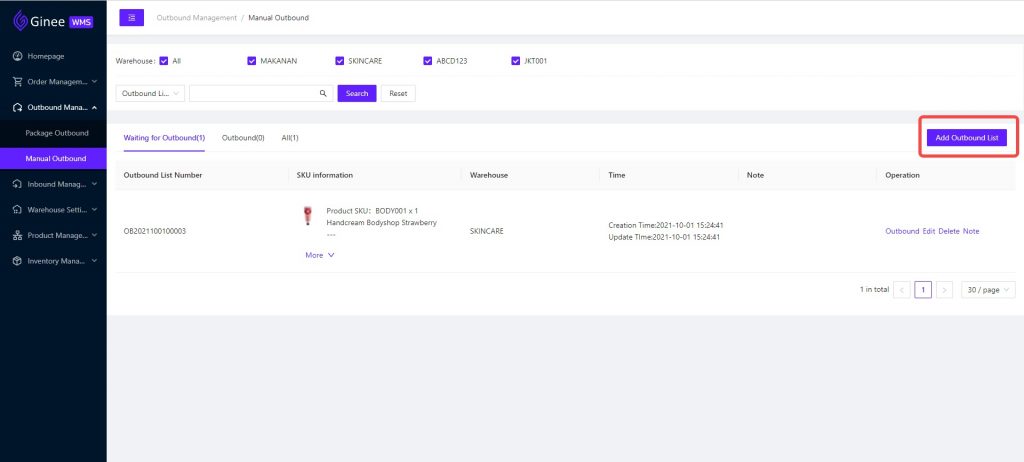
Step 2: Select Warehouse > Add Product > Fill in the Outbound Quantity
Inbound Management
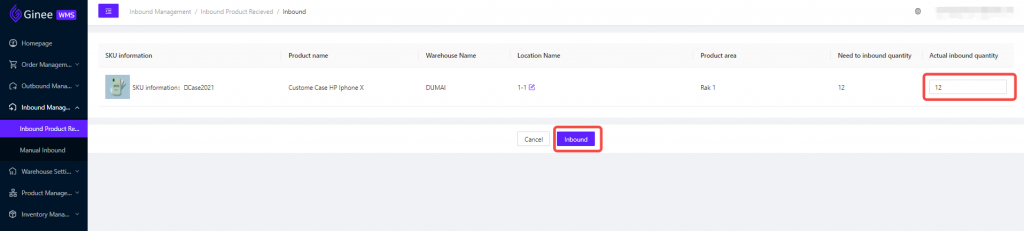
Inbound Product Received
Feature Overview : ERP push Inbound list to WMS, and WMS operator operate the Inbound after receiving the package
Step 1: ERP push Inbound list to WMS, click on Inbound button
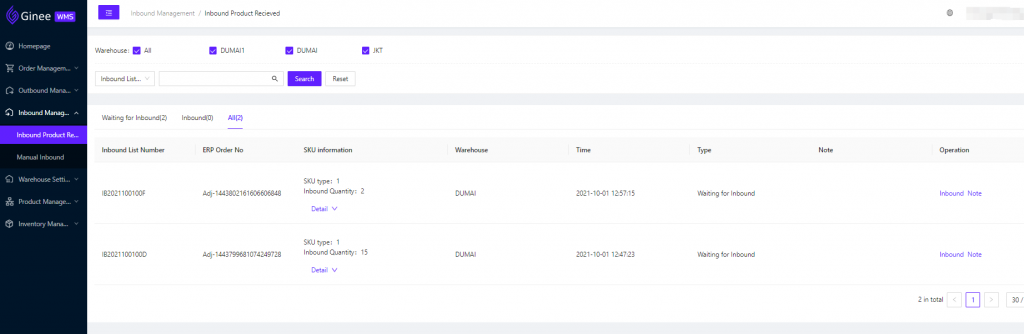
Step 2: Fill in the estimate time for Inbound
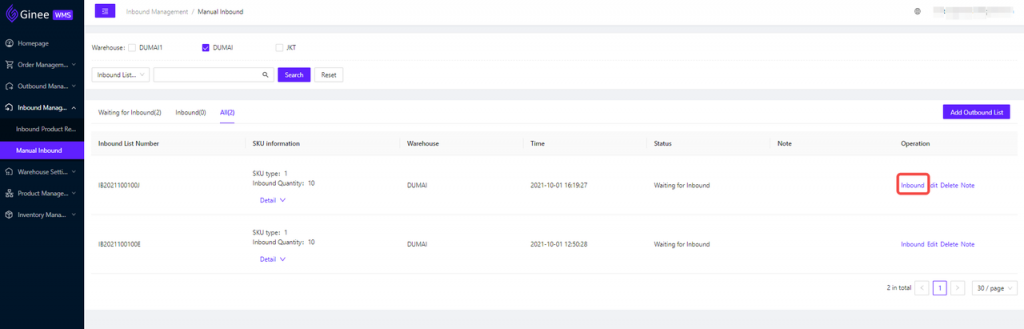
Manual Inbound
Feature Overview : Manual adjustment of warehouse stock is required in the warehouse, and the operator manually create an Inbound list for operation
Step 1: Click Add Inbound List

Step 2: Fill in Relevant Information
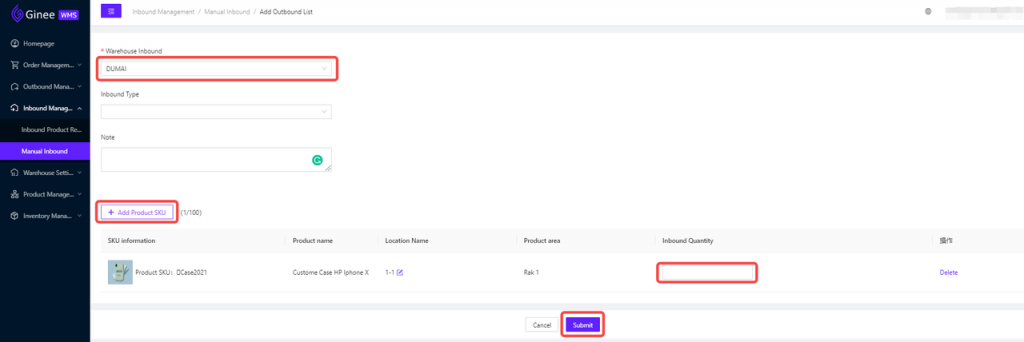
Step 3: Click on Inbound button, then the Inbound process is successful
Warehouse Setting
- Warehouse List
Warehouse: The general name for buildings and places where products are kept and stored
Step 1: Click New Warehouse
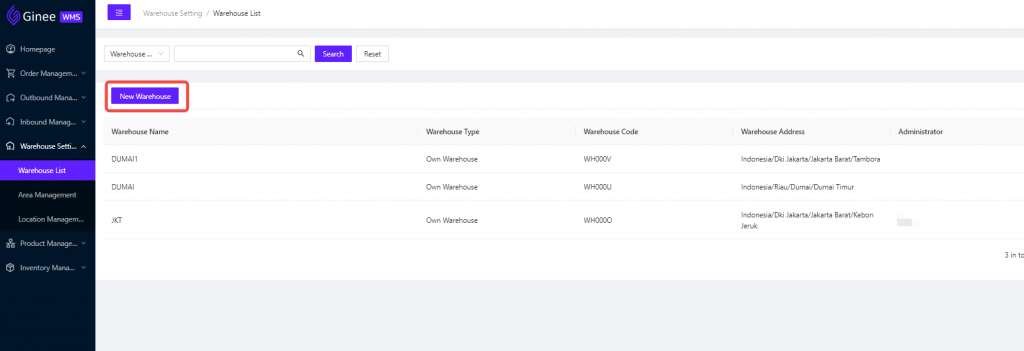
Step 2: Fill in the Basic Information (warehouse name is required and cannot be repeated), click OK and New Warehouse is Successfully Created

- Area Management
Product Area: used to distinguish functional divisions in actual operations
Function: Used for business differentiation, such as distinguishing large product storage area, small item picking area, packaging review and other functional areas; for work distribution, the system will mark the warehouse area for outbound orders and replenishment operations, which is used to assign work according to the warehouse area;
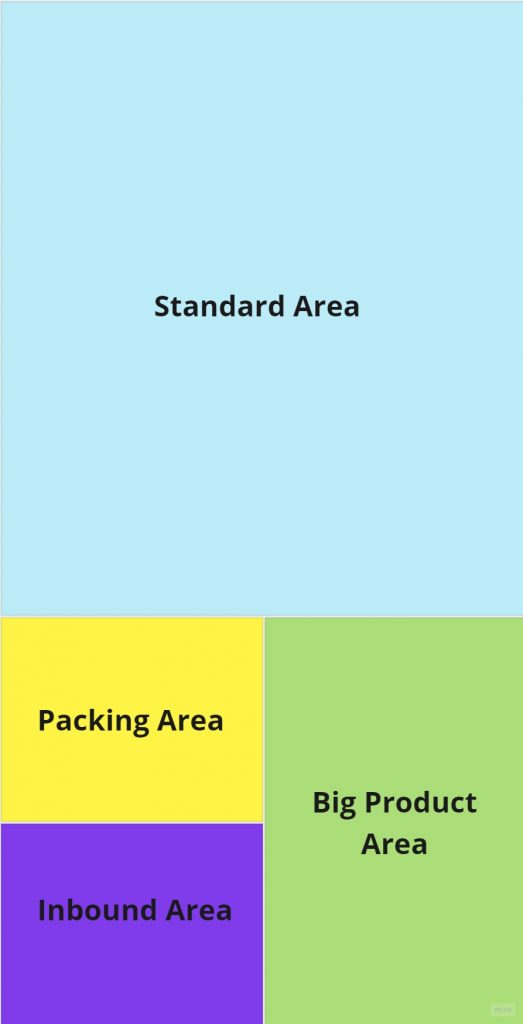
Product Area Distribution
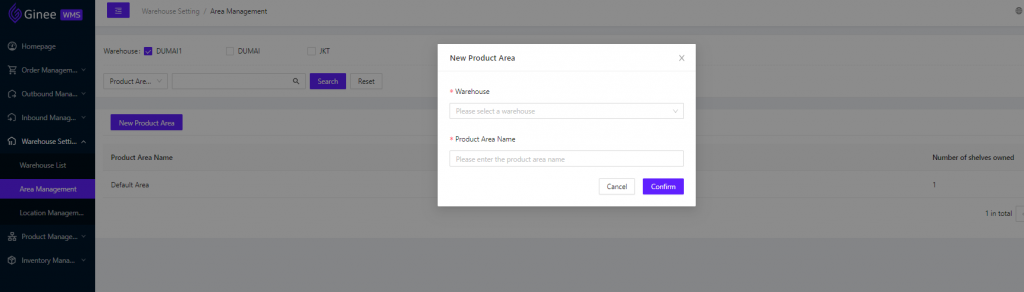
Step 1: Click New Product Area
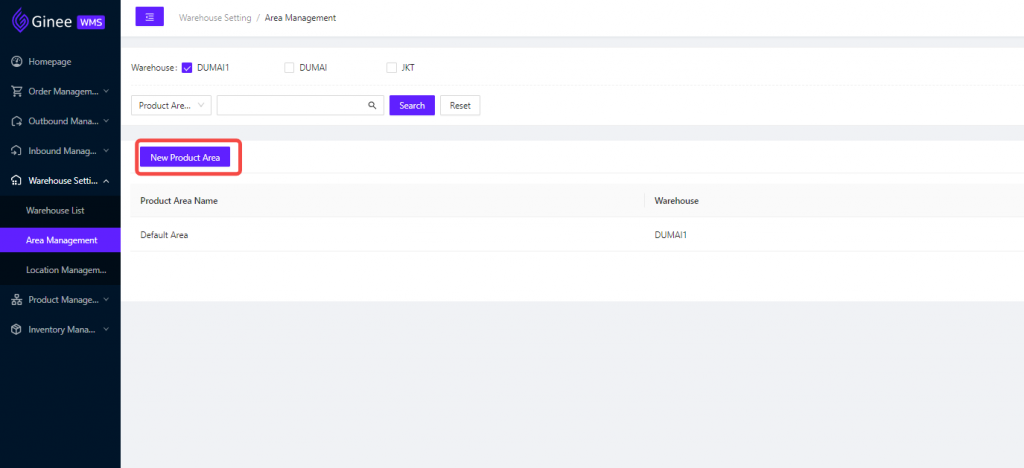
Step 2: Fill in Required Information, click OK, New Area is Successfully Created
- Location Management
Product Location: A pallet in the whole storage area is a ground stacking location, and each grid on a shelf in the picking area is also a location;
Function: It is used to mark the precise position of the product in the warehouse. Location is the smallest positioning mark in the warehouse;
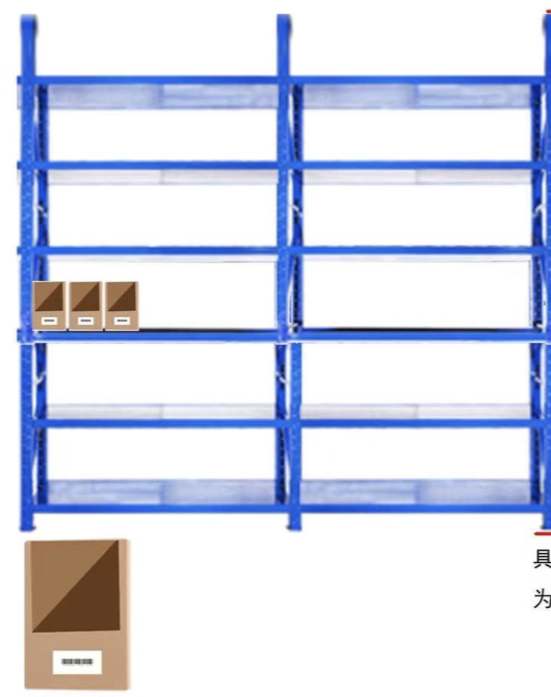
Product Location Image
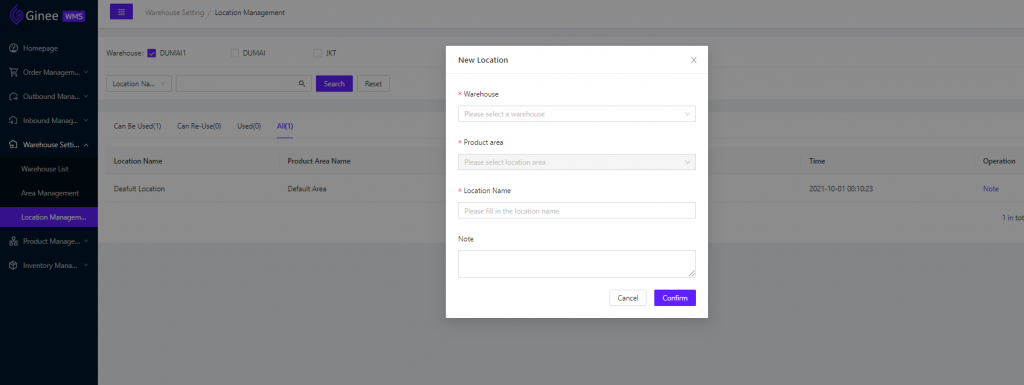
Step 1: Click New Location
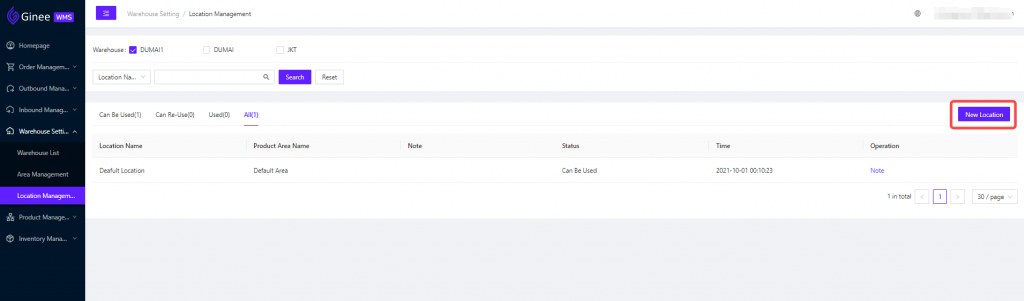
Step 2: Select Warehouse and Area Under the Selected Warehouse, Fill in Location Name, Click OK, and New Location is Successfully Created
Product Management
- OMS/ERP Push Product to WMS
After OMS/ERP create the product, it will be automatically pushed to WMS
Note: The customer’s product is created in the OMS/ERP system and OMS/ERP cannot be modified after being pushed to the WMS
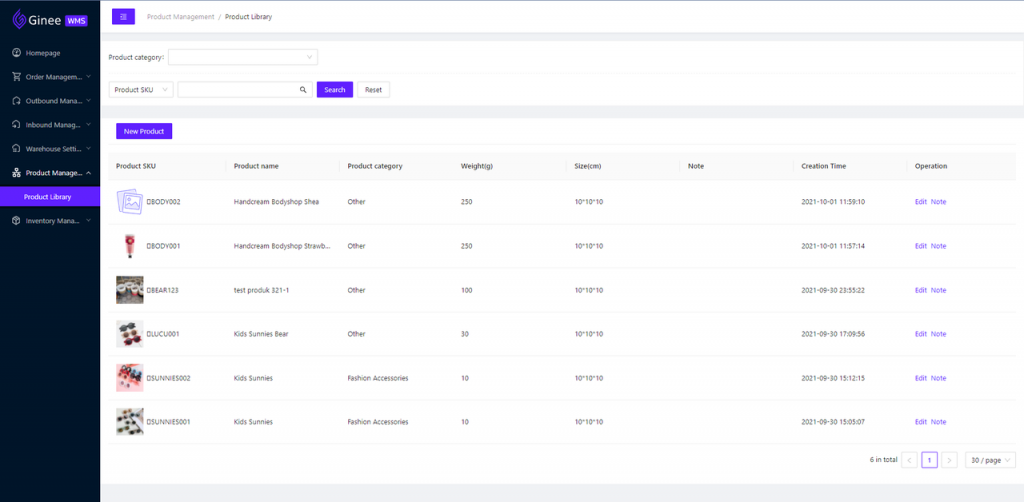
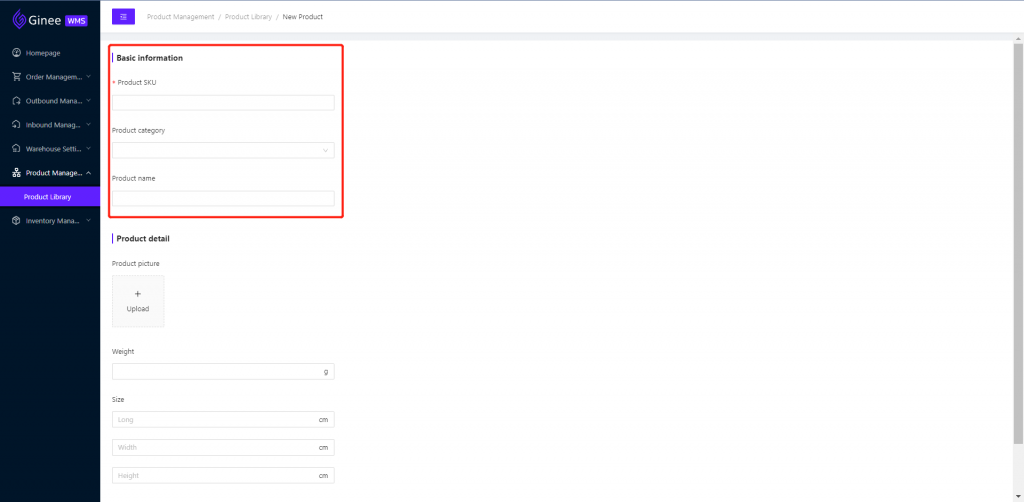
- Create Product Manually
Steps: Product Library > Create Product > Fill in the Product Information, marked with a red (*) is required (SKU is required)
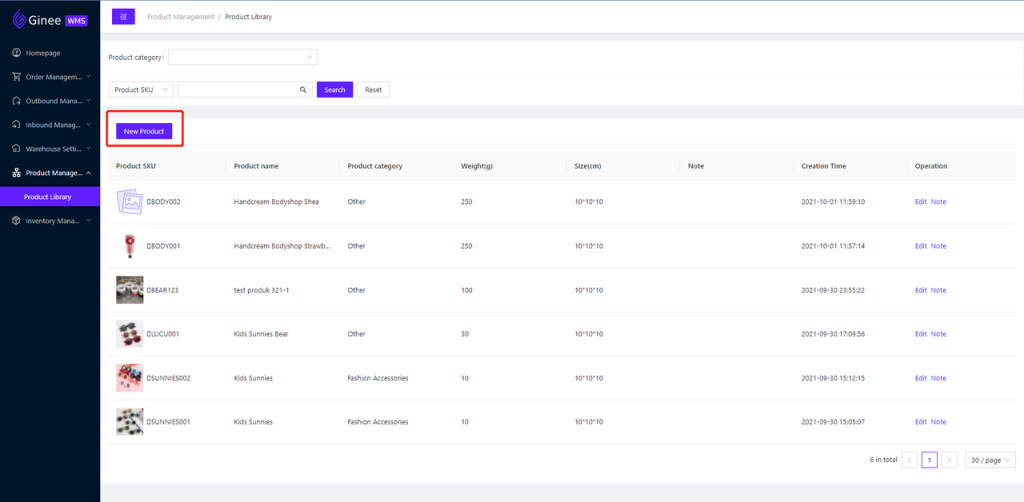
Fill in the basic information, click OK, the product is successfully created
Inventory Management
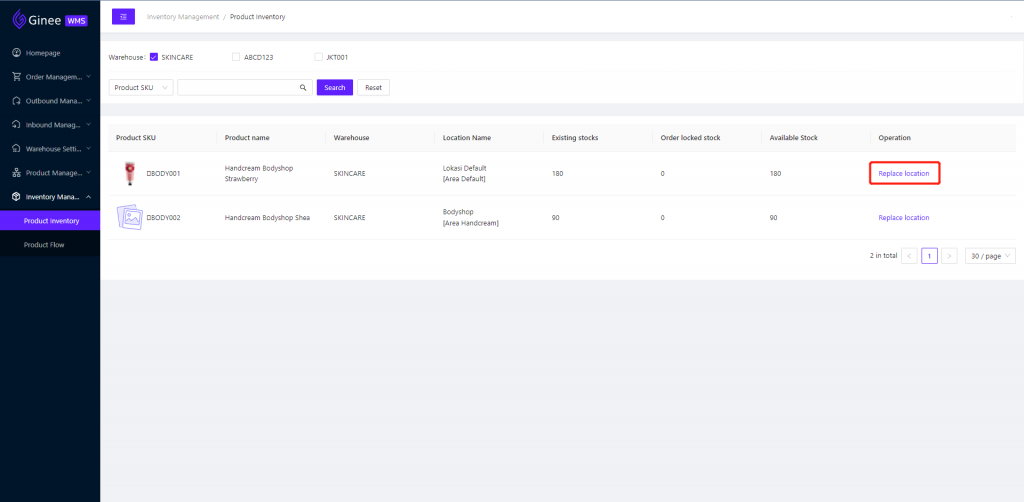
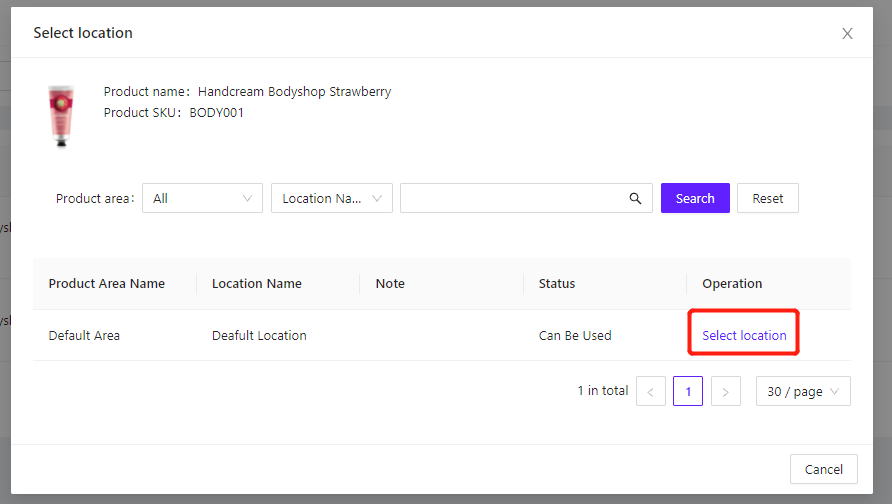
- Product Inventory
Function overview: Users can search product stock in the warehouse and can change the location
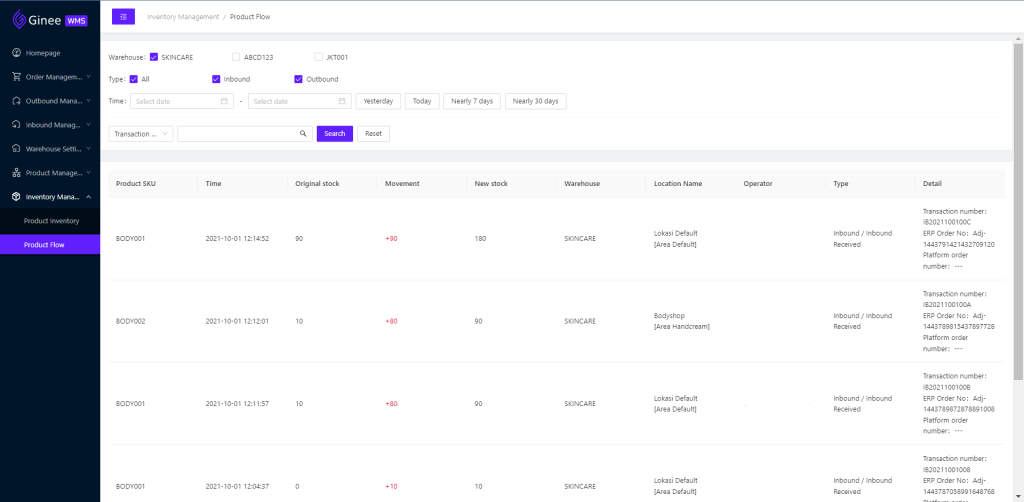
- Inventory Flow
Feature Overview: Users can view the flow records of every Outbound and Inbound in the warehouse